Circus/Cyr Wheel

LED Cyr Wheel v2: Test Video
Some quick test footage from last week; I used the wheel for the first time last Friday for an event put on at the Exploratorium by Velocity Circus. It works AWESOME! EDIT (2/24/15). Check... [read more]
Apr
6
2014
How to build a Cyr wheel or roue cyr: materials needed
A lot of people email me asking what materials to use for building cyr wheels (also known as a roue cyr, rouè cyr, or simple wheel). I like “thick” wheels (also known as a “fat... [read more]
Apr
6
2014
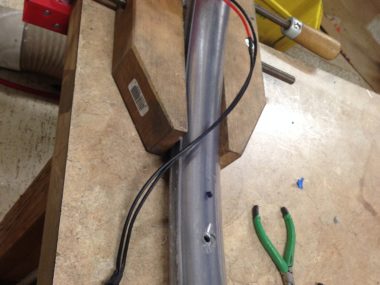
LED Cyr wheel: on/off switch.
I’m using a 6amp 120V on/off switch. I might be running up to 16 amps through it. We’ll see if this works.. The switch is fished through with wire and fishing line.
Mar
29
2014
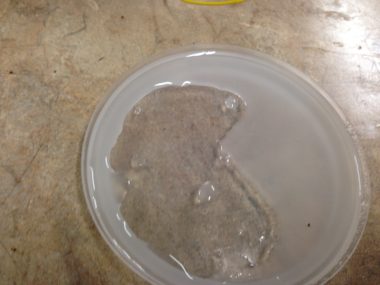
LED Cyr wheel: casting…more info
I learned some more things about casting the EpoxaCast 690. On one of the last pieces it was really opaque: I called Smooth-On the next day and asked about it. They didn’t know, so I... [read more]
Mar
28
2014
LED Cyr wheel notes: casting
Here’s some notes on casting…maying for myself when I go back to do this again and try to remember what I was doing. First, to get the curve, I would cut the LEDs every 6... [read more]
Mar
23
2014
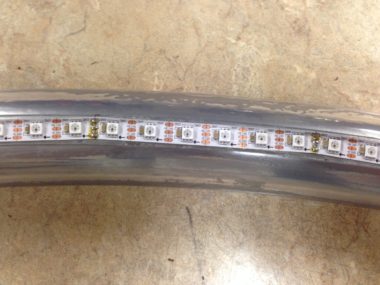
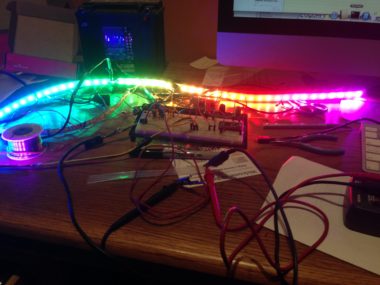
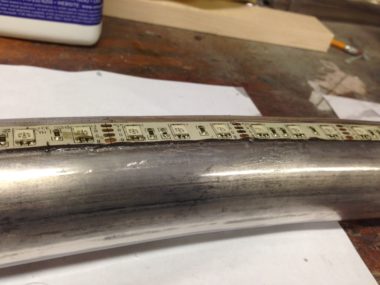
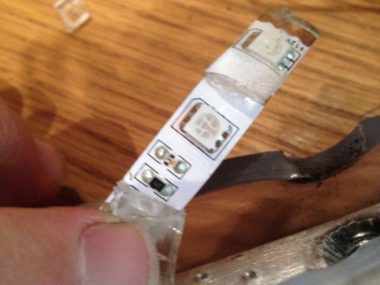
LED Strip test and resin/epoxy
Each time I wire up a new piece I test it to make sure I didn’t mess something up. Here is a test of 4 pieces, rainbow pattern: I did one section covered in the... [read more]
Mar
17
2014
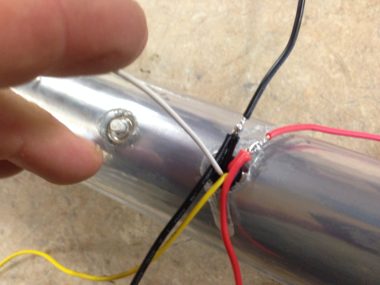
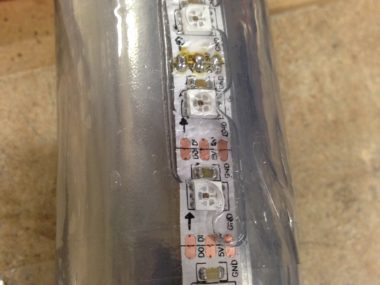
LED Cyr wheel: Wiring up the wheel
I have a 5 piece wheel, and I have a “top” side for reference, and the numbers go from one to five in a counter clockwise direction. This is piece 1 to 2, with the... [read more]
Mar
16
2014
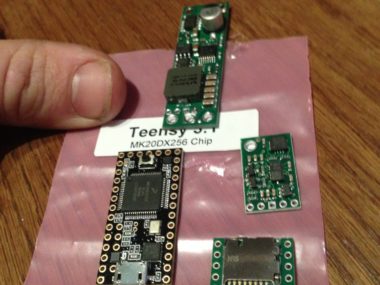
LED Cyr Wheel: v2: Chips etc
Here’s some of my progress and notes on making my new cyr wheel. This is partially so I can look back and remember what I did if I have to take it apart for some... [read more]
Mar
15
2014
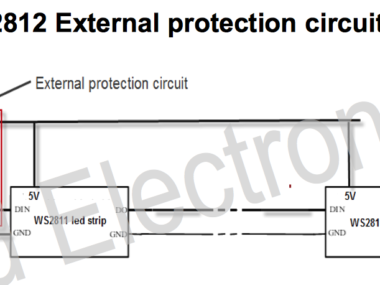
LED Cyr wheel: WS2811 / WS2812 strip first pixel dying/burning out
I’m having trouble with the WS2811 / WS2812 strip and the first pixel dying or burning out. First off, I thought I ordered the WS2812B strips, which are supposed to be reverse voltage safe. However,... [read more]
Mar
12
2014
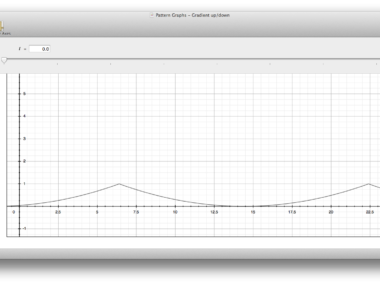
LED Cyr wheel: designing patterns
I’ve had to re-remember a lot of old math that I haven’t used since probably sophomore year in high school; my jr year and beyond was all calculus…which is past what I’m doing here (so... [read more]
Mar
1
2014
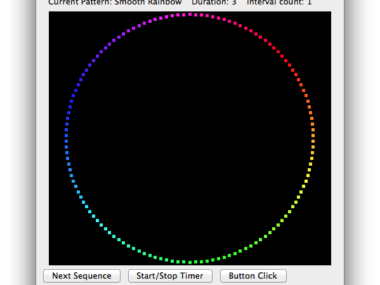
LED Cyr Wheel Pattern Editor
I’m still working on my LED cyr wheel. I’m creating a desktop application to edit patterns, and eventually simulate POV (persistence of vision). For now, it just runs the pattern in a mock-display. I simply... [read more]
Feb
28
2014
LED Cyr wheel v2: LEDs arrived
I got my LEDs today! I did some basic testing, and they seem okay. That’s awesome..I saved like half the cost of buying them from a US supplier. The new wheel is bent; I used... [read more]
Jan
31
2014
LED Cyr wheel: Tests
Here’s my planned wire diagram (it will probably change a bit) It may only make sense to me. I’m wonder if the LEDs that are furthest from the power source will be equally bright. This... [read more]
Jan
20
2014
Molex Micro Fit Connectors
I was going to use molex micro fix connectors; they can carry up to 5amps…but I think that isn’t enough, as the wheel could draw 10+ amps. So, I ordered some Molex Mini Jr connectors.... [read more]
Jan
16
2014
LED Cyr Wheel: power draw
In one of my last posts, I discussed power draw. In theory, 360 LEDs on each side of the wheel (720 total) might draw a ton of power (20+amps) based on the specification for the... [read more]
Jan
15
2014
LED Cyr wheel: battery
11.1v 1200mah Lipo battery compared to a 9.6v 1400mah NiMH 8-cell pack: And the rainbow pattern on my LEDs:
Jan
15
2014
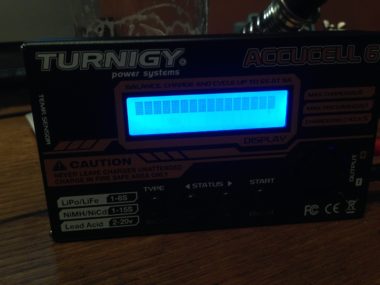
Turnigy Accucell 6 Charger: do not buy!
I bought the Turnigy Accucell 6 charger to charge LiPO cells for my LED cyr wheel. It has already failed! I charged one cell with it, and started discharging it. The display went to all... [read more]
Jan
14
2014
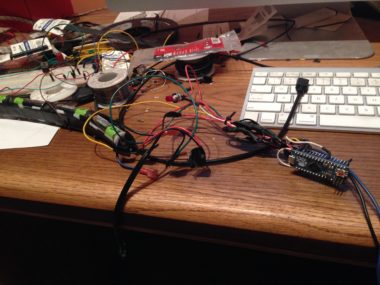
LED Cyr wheel: More LED Notes
Teensy/Hardware control LEDs! I got my Teensy 3.1 board and started playing with the digital LED strips I got. I was having a heck of a time getting any sample code to work. I finally... [read more]
Jan
13
2014
LED Cyr wheel jig completed, and casting
I completed the jig, centered it on the wheel and then screwed the jig to the wooden sliders: I took the jig off, and cut out the center hole to be bigger than 1/2″ (I... [read more]
Jan
10
2014
LED Cyr Wheel: Jig for groove
First, I got my HH-66 Vinyl Cement mentioned in the adhesives post. I tested gluing a piece of wheel together, and it works somewhat..although it takes a long time to dry and doesn’t do any... [read more]
Jan
8
2014
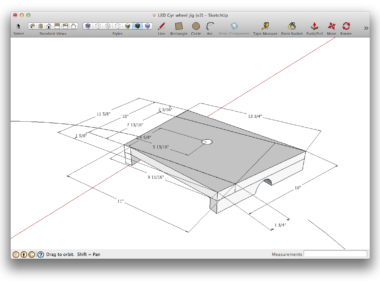
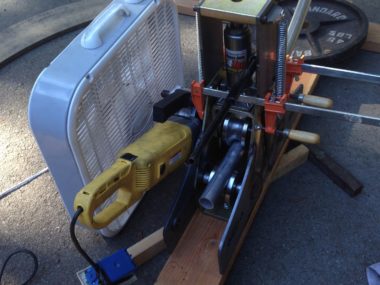
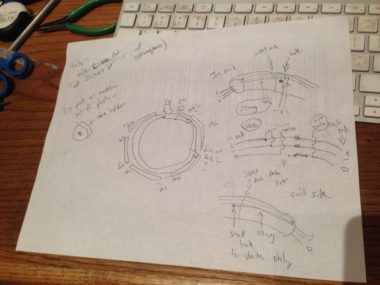
LED Roue Cyr – Jig to slot tubing
Here’s a sketch up design I did of a jig to cut a groove in the PVC tubing for the LEDs. A router will be attached in the center; it will (hopefully) be used to... [read more]
Jan
5
2014
LED Cyr Wheel v2 (Parts List – LED stuff)
Here is a running parts list of what I’m buying for my new LED Cyr Wheel v2: LEDs/Microprocessor: 10 – $3.20 – COM-08982 – Electrolytic Decoupling Capacitors – 1000uF/25V ($0.32 ea.) 2 – $39.90 –... [read more]
Jan
3
2014
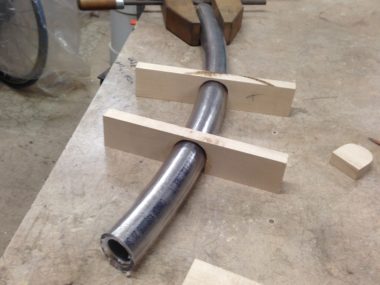
Metal for Cyr Wheels
I just ordered some metal from a local place to make another cyr wheel / roue cyr; it used to be Metal Supermarkets but now is Guerrilla Metals. I ordered 2 20′ pieces of 1.5″... [read more]
Jan
3
2014
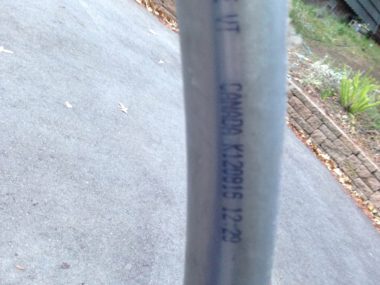
Cyr Wheel Skinning: Not all tubing is the same!
I’ve ordered a few different types of skin for my cyr wheels. On one wheel, it has pieces from two different batches and kinds.This has shown me that one is much better! Both are 1.5″... [read more]
Dec
30
2013
LED Cyr Wheel v1 Problems
Some of the problems with my original LED cyr wheel: 1. LEDs are dying, from me stepping on them. I took one of the bad sections apart, and it seems to be because some solder... [read more]
Dec
29
2013
LED Notes / LED Cyr Wheel v2
I’m investigating LEDs for another LED cyr wheel (v2). Here is my first LED Cyr wheel and a video. I figure I’ll just make my notes on my blog for others to benefit. Goals: Individually... [read more]
Dec
28
2013
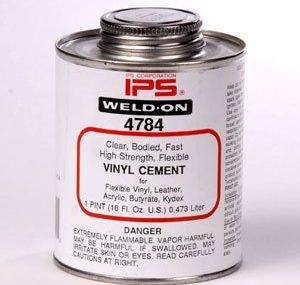
Adhesives
I’m investigating adhesives, and ways I can bond the plastic PVC tubing on cyr wheels back together. I want to cut the plastic tubing, and embed LEDs under it for some cool effects. For my... [read more]
Dec
22
2013
Making the LED Cyr Wheel / Roue Cyr – version 1
Here are my rough notes about making my LED cyr wheel (version 1). A Video can be seen here. Edit: 12/28/2013: Here are some problems I am having with this LED Cyr Wheel v1 I... [read more]
Oct
21
2013
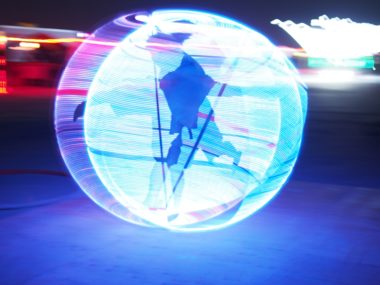
LED Cyr Wheel / Roue Cyr videos
Here are some videos of the LED Cyr wheel at Burning Man 2013 Spencer also put together a compilation of it here (with a Fire Cyr wheel and LED Unicycle!):
Oct
8
2013
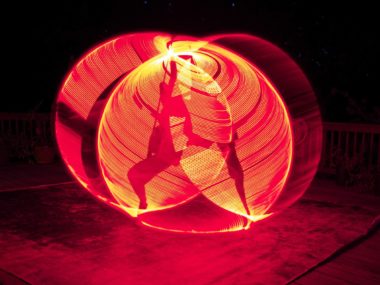
LED Cyr Wheel Pictures
Here are a few pictures of my LED cyr wheel. I setup my Canon 5D on a tripod and my dad hit the shutter button (via a remote). In general, about 0.4s exposure, f2.8, iso1250.
Sep
12
2013
LED Cyr Wheel
I made an LED cyr wheel! Details coming soon. I brought it to burning man 2013 and camped with my “Circus Boot Camp” friends. Ray took this picture:
Sep
4
2013
As an Amazon Associate I earn from qualifying purchases.
(c) 2008-2025 Corbin Dunn
Subscribe to RSS feeds for entries.
50 queries. 0.233 seconds.