Treehouses
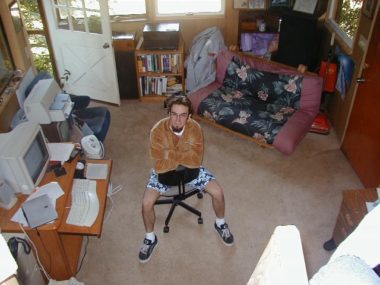
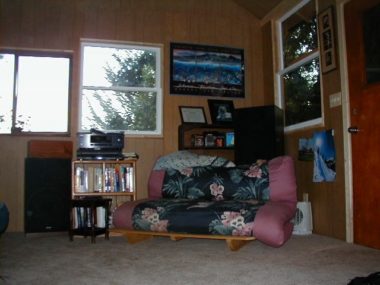
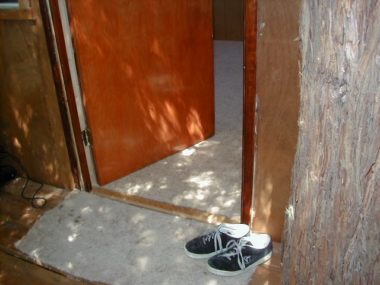
The Second Treehouse in 2000 – Interior Shots – part 10
Here I am with my velour sweater. I loved velour and I’d scour all the vintage and used clothing stores to find them. I’d buy them even if they were too big for me. I... [read more]
Nov
19
2018
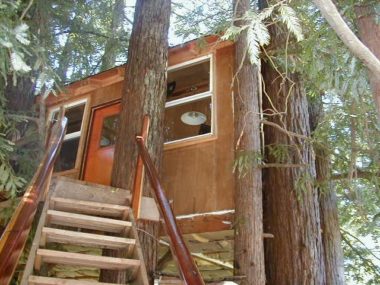
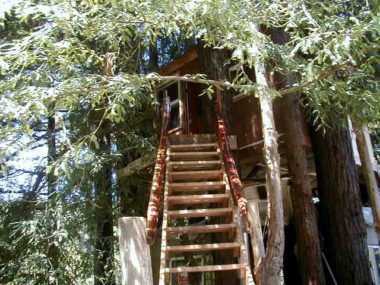
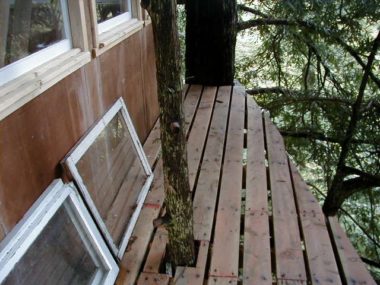
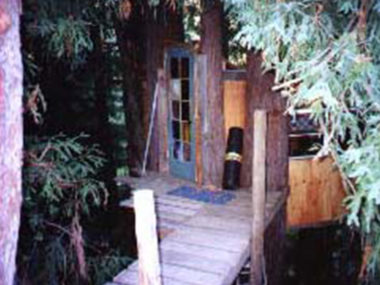
The Second Treehouse in 2000 – Close Exterior Shots – part 9
More photos! Coming into the treehouse: The back deck, with lots of plants starting to grow:
Nov
18
2018
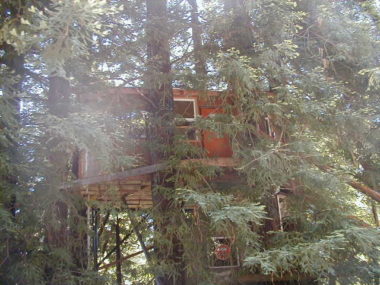
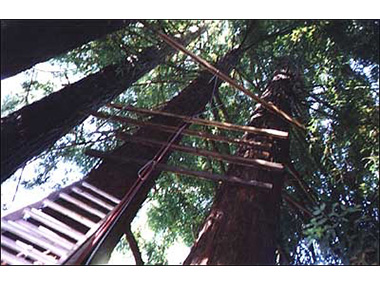
The Second Treehouse in 2000 – Exterior Views – part 8
I’m still converting pages over. Here are a *lot* of pictures from back in 2000. It is hard to imagine that this was 18 years ago.
Nov
17
2018
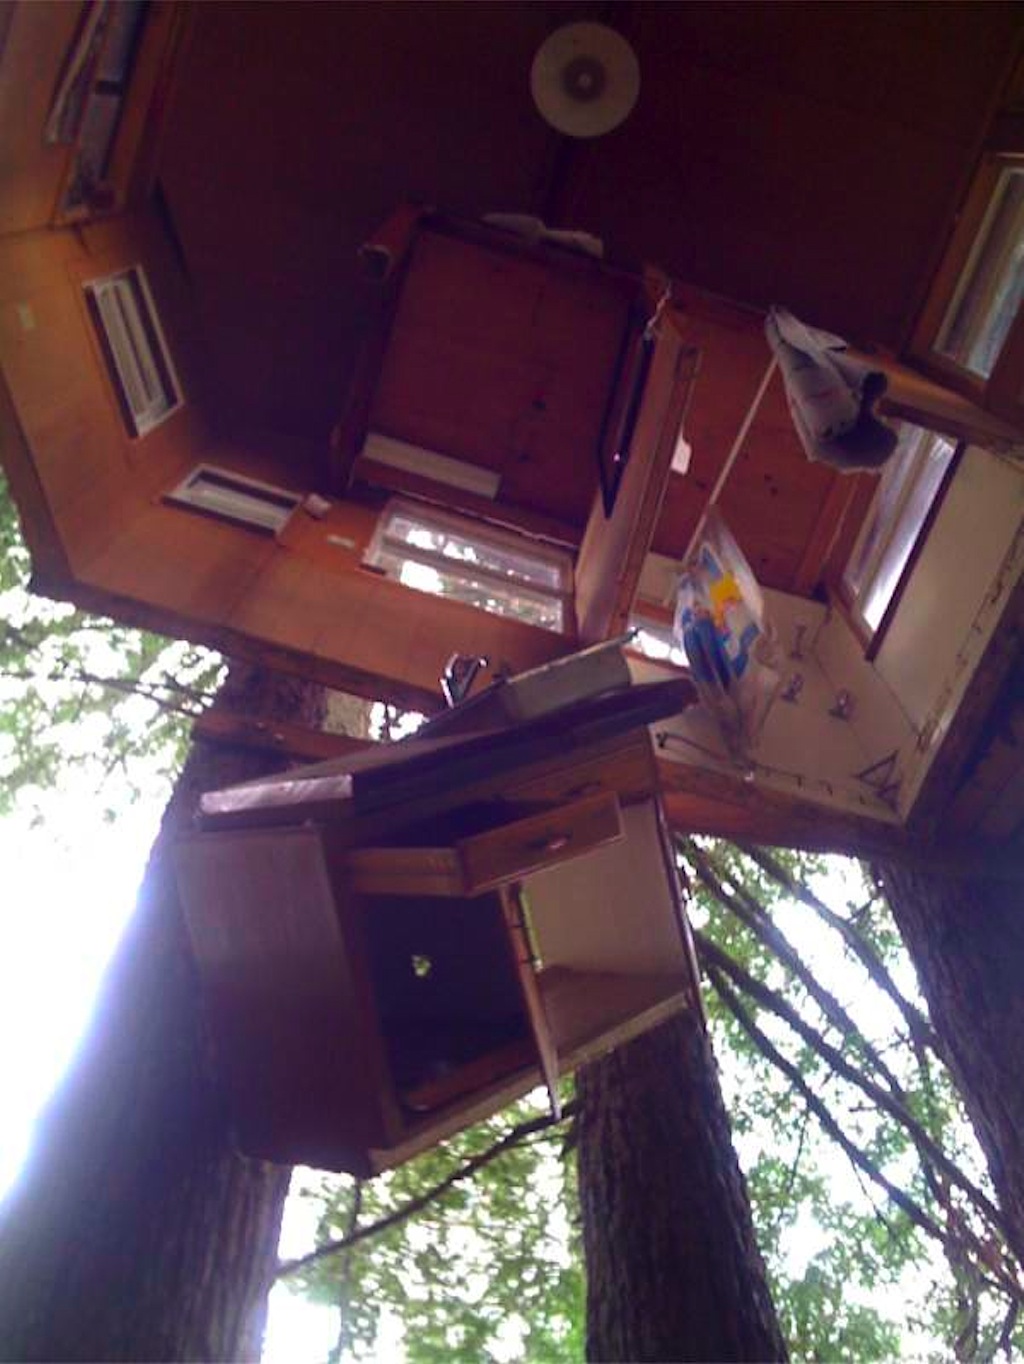
The Second Treehouse in 1999 – Furnished – part 7
I’m still converting old web pages from the late 90’s to a “modern” WordPress format. Here are some pictures from 8/26/1999! I had just tossed in some furniture and was planning to move in that... [read more]
Nov
16
2018
The Second Treehouse in 1999 – Before Move In Day – part 6
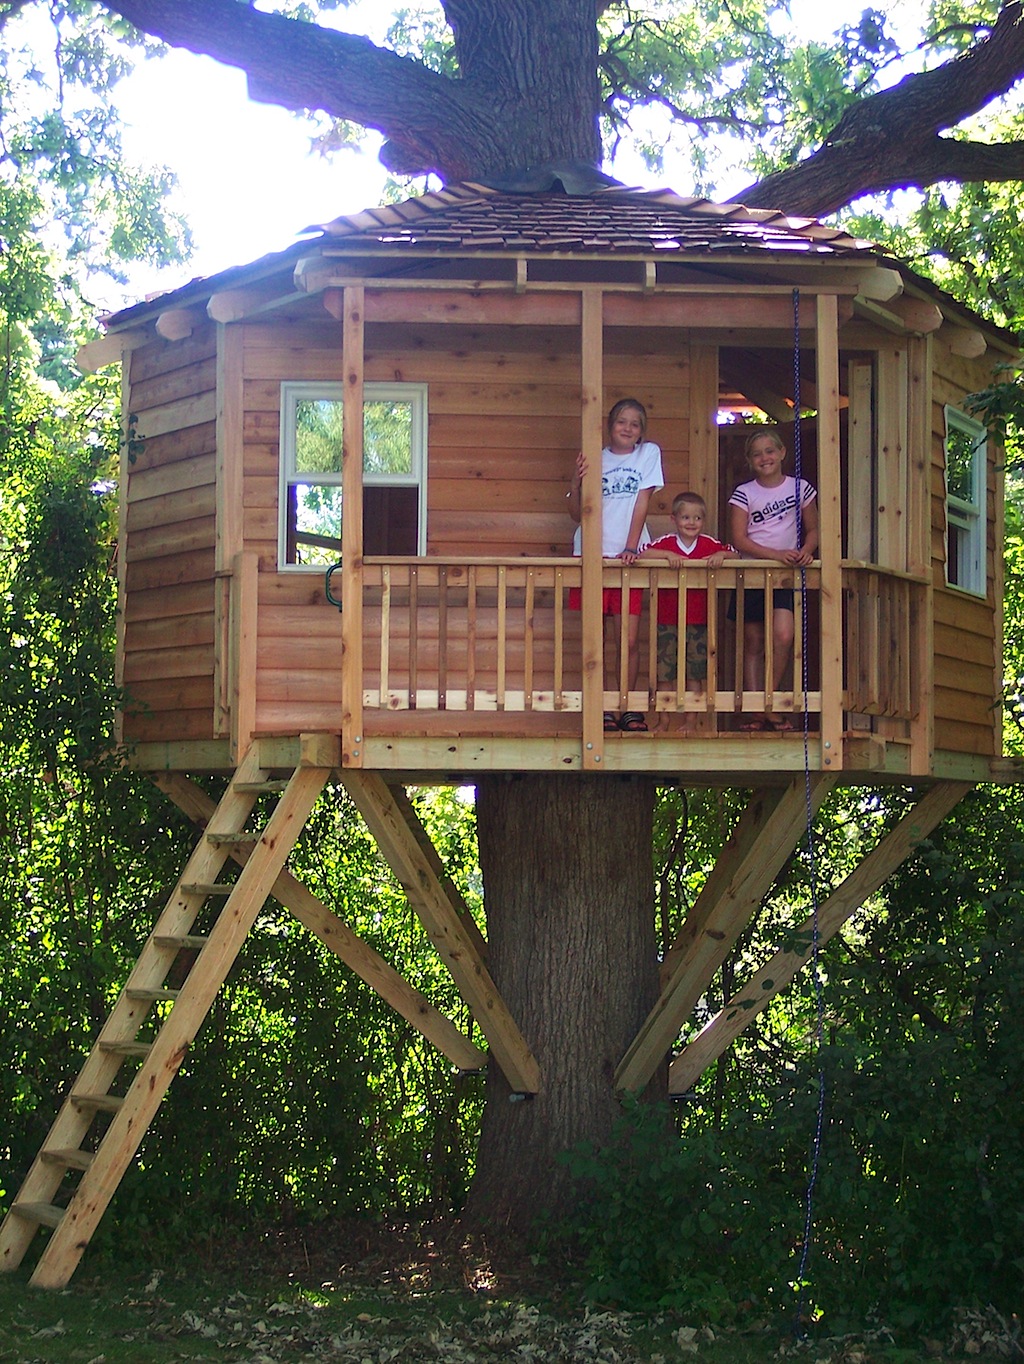
These are from 8/16/1999. The day before I moved into my treehouse. I spent about 5 years in the treehouse before moving out. It survived 10 years before falling to the ground.
Nov
15
2018
The Second Treehouse in 1999 – The Interior Comes Along – part 5
Just a page of pictures that I posted to my site back on May 6th, 1999. This is a picture of the stairs going up to the house. The railing is made of some... [read more]
Nov
12
2018

The Second Treehouse in 1999 – Outside Pictures – part 4
The is a continuation on my series reminiscing about the second treehouse that I built. Previously, I showed initial design, construction starting, and then the house starting to appear. Back in May 1999 I put... [read more]
Nov
8
2018
The Second Treehouse in 1999 – A House Appears – part 3
Here are some pictures that come from April 6th, 1999. I started construction of this treehouse back in 1998, but it took me about a year to complete it. I recall that my dad got... [read more]
Nov
7
2018
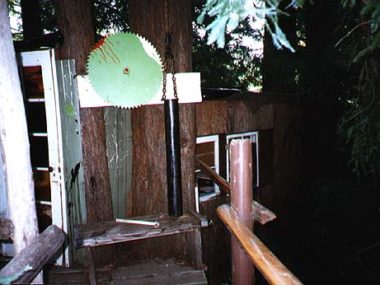
The Second Treehouse in 1998 – Construction Begins – part 2
This is a continuation of The Second Treehouse in 1998 – part 1. Once I had the floor layout I could start building the treehouse. The entire process took about a year from start to... [read more]
Nov
5
2018
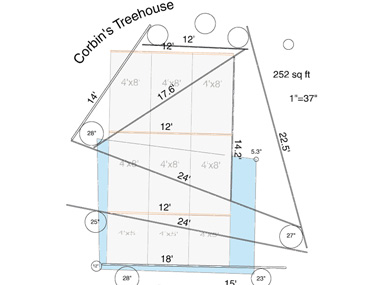
The Second Treehouse in 1998 – Why and the Floor – part 1
Back in about 1998 I decided to build a proper treehouse to live in. A lot of this information comes from my website back in the early 2000’s when I documented the build process, and... [read more]
Nov
4
2018
My First Treehouse (pt2) 1997
This is a continuation of “My First Treehouse”. Below are some pictures I scanned of it back in 1997. All text is written by me back then. — I scanned these pics that I... [read more]
Oct
26
2018
My First Treehouse (pt1) 1992
I’m converting some of my old website into proper blog entries. Below is some text that I wrote back in 1992 when I was 14 years old and made my first website. All phrases and... [read more]
Oct
25
2018
Some amazing treehouses
A friend pointed me to a link on MNN with some amazing treehouses. That led me to Romero Studios. They have built some quit amazing treehouse structures, such as the screen shot below. Check them... [read more]
Mar
31
2011

Treehouse Fall Down – Video
This is a follow up to the last post where I posted pictures.
Mar
6
2011

Treehouse Fall Down – Pictures
The main part of my old treehouse fell down quite some time ago. however, the walls were left standing until a while ago when they finally fell too. Here’s a few pictures. I’ll post a... [read more]
Mar
5
2011
Talking Treehouses on Irish Radio
Tom Dunne of newstalk 106-108 FN in Ireland called me at 4:30 in the morning one friday to talk about treehouses. You can listen to the recording: Go to http://media.newstalk.ie/listenback/, then Tom Dunne, Archive, March... [read more]
Mar
27
2010
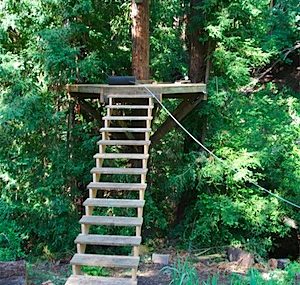
The Circular Treehouse: Zip Line and Finishing
Ah, some pictures and details I meant to post ages ago. Building stairs for the treehouse: Accessories for the zip line: And me installing it:
Aug
18
2009
The Circular Treehouse: Zip Line to the Treehouse Video
I’m still working on it, but here’s a short video of some of it.
May
22
2009
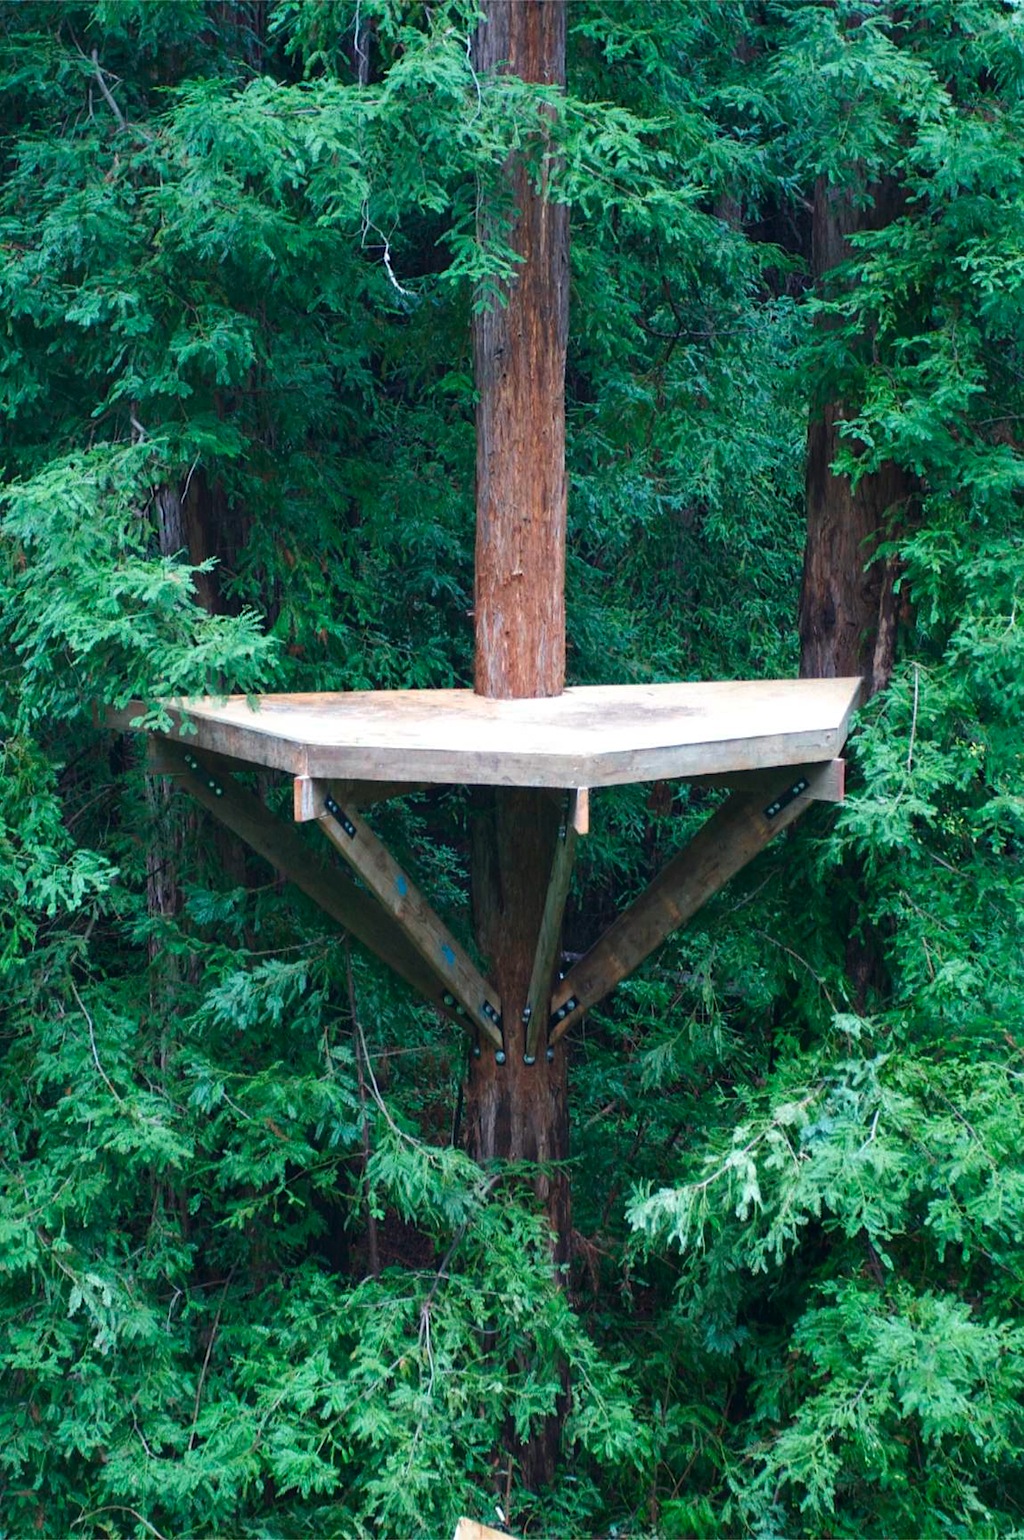
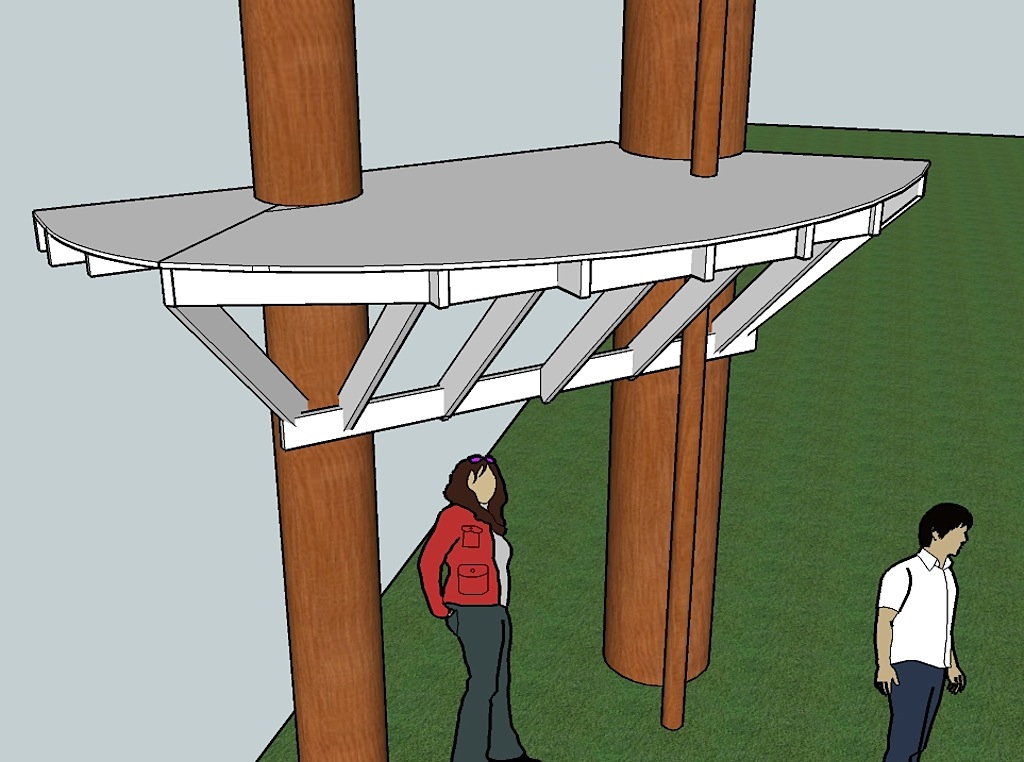
The Circular Treehouse – Platform Sneak Peak
Well! Today I finished the base platform. This is all I’m planning on doing for the “event” (edited in 2018). Well, this and adding stairs. Sometime I may turn it into a real treehouse with... [read more]
May
3
2009
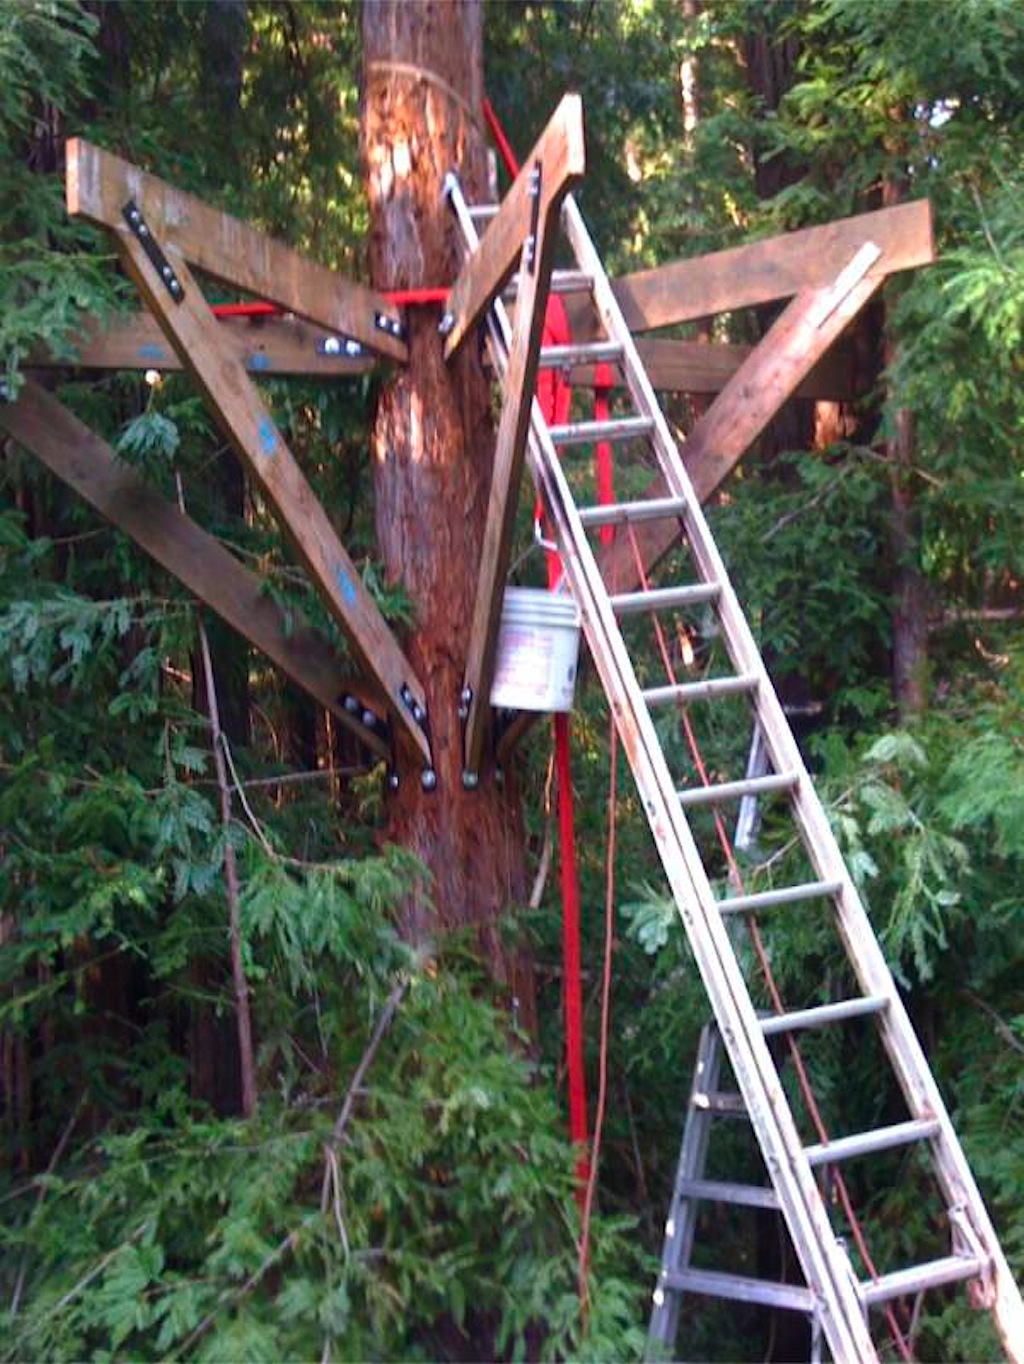
The Circular Treehouse – Beam Install
The first step was to install the top brackets. Well, first had to get the proper bolts. I wanted to use 3/4″ thick (radius) by 8″ long lag bolts — galvanized to support the weather.... [read more]
Apr
30
2009
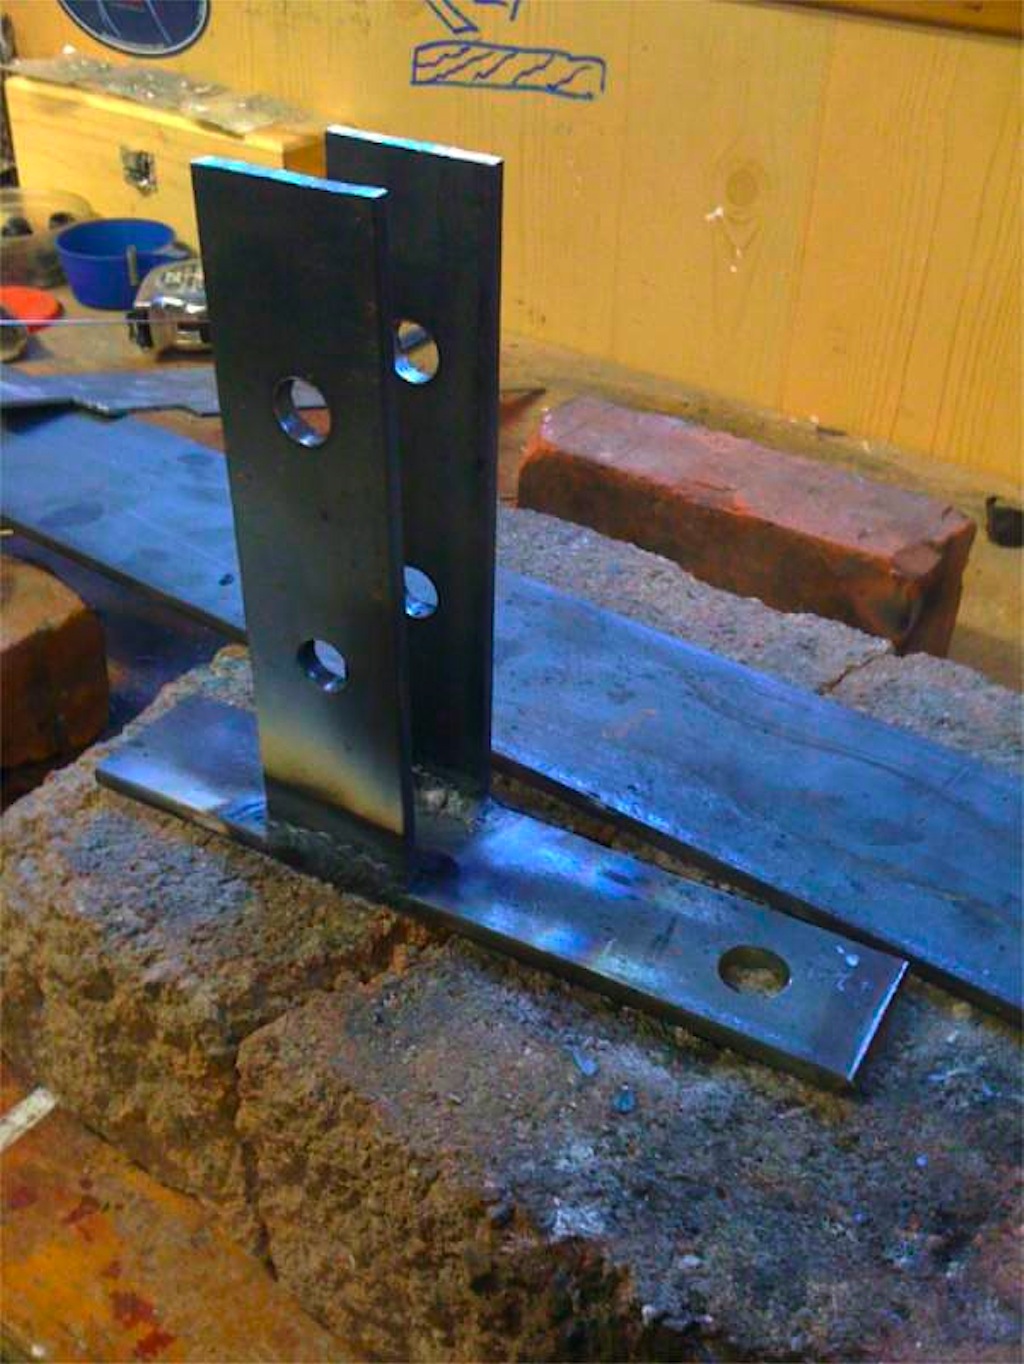
The Circular Treehouse – Bracket Fabrication
I bought some 4” wide by 1/4” thick steel from SIMS metal in San Jose with the intent on using it to make brackets. Now, 4” would be perfect if I used 4x4s for the... [read more]
Apr
29
2009
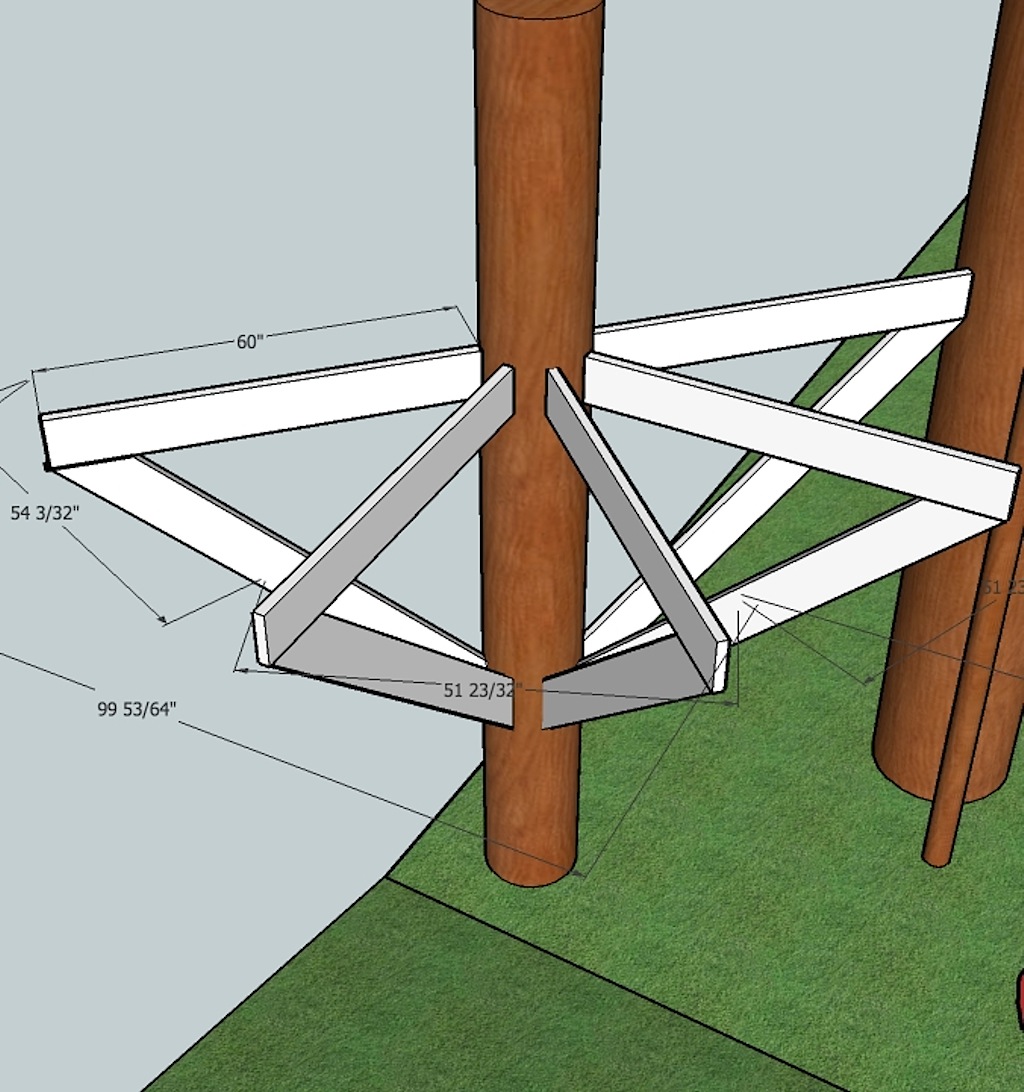
The Circular Treehouse – Updated Plans
I decided to redo my “special event” treehouse concept. I wanted something far enough out in front of the trees to suffice as a proper area to stand for the ceremony, and the typical umbrella... [read more]
Apr
28
2009
Tree Top Builders
I would like to give a big thanks to Dan Wright, from Tree Top Builders out in PA. Dan has been building some amazing treehouses for quite some time and is well experienced in the... [read more]
Apr
28
2009
My treehouse fell down!
Well, a few weeks ago it finally happened. My treehouse fell down! Well, not entirely; about 3/4 of the floor fell out. I took a few pictures with my iPhone; I’ll probably be going back... [read more]
Mar
14
2009
The Circular Treehouse: Building a New Treehouse
(Update in 2018, I edited this content a bit. I had made this for a special event with my previous partner, and decided to reword some things mainly for my own sanity). I decided to... [read more]
Feb
8
2009
Pete Nelson’s latest treehouse
From his blog: http://petenelson.wordpress.com/2009/01/05/a-treehouse-north-of-seattle-2/ Just amazing, as usual!
Jan
6
2009
The Canopy Cathedral « The Treehouse Guy
An amazing new Treehouse by Peter Nelson. [From The Canopy Cathedral « The Treehouse Guy]
Jun
12
2008
Peter Nelson’s Treehouse Blog
I just ran across a great blog, Peter Nelson’s The Treehouse Guy. He wrote several great treehouse books, some of which were the inspiration to make my own treehouse.
Apr
13
2008
French Treehouse
Some guys who made a cool treehouse in france emailed me a link to their site: http://www.cabanepassion.fr/index_eng.htm The treehouse is great! They have a spiral staircase and a lift custom made out of steel: http://www.cabanepassion.fr/acces-cabane-perchee_eng.htm... [read more]
Feb
7
2008
House for rent (that has my treehouse on it) in Corralitos, ca
Most of my family lives in Hawaii, but they still have a house over here in Corralitos, Santa Cruz County, California. My dad decided we should rent it out, so it will be available (starting... [read more]
Jan
31
2008
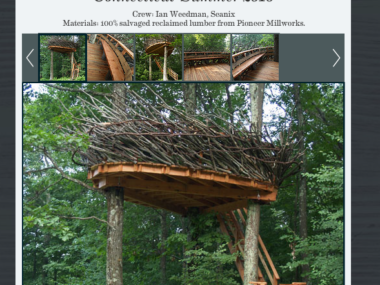
Artisan Tree & Treehouse
I’ve always loved treehouses, and eventually I hope to build a few more on my property. Until then, I’ll have to live vicariously through other treehouse builders. Steve Chmielnicki, of Rosemont, PA, is an excellent... [read more]
Jan
26
2008
As an Amazon Associate I earn from qualifying purchases.
(c) 2008-2025 Corbin Dunn
Subscribe to RSS feeds for entries.
50 queries. 0.229 seconds.