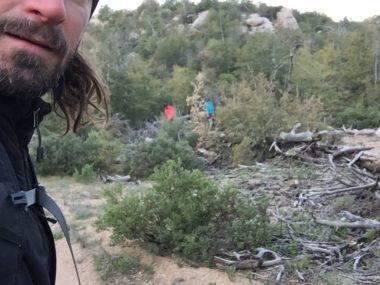
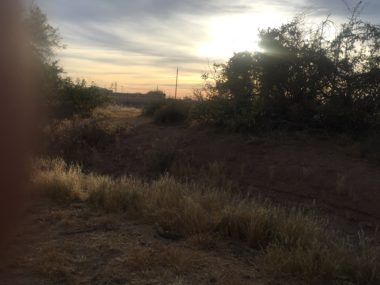
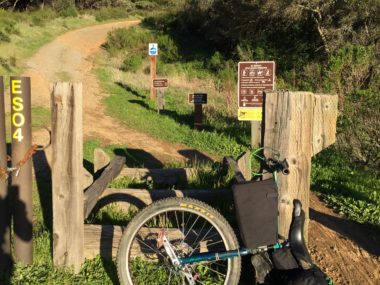
The Arizona Trail by Unicycle: Day 12, The Day of the Push
April 11, 2017 A 15 mile hike pushing a unicycle is hard work. Add on 5 miles of riding and it makes for one long day. The views and scenery should make up for it,... [read more]
Apr
21
2017
The Arizona Trail by Unicycle: Day 11, Shade and Cracks
April 10, 2017 Yesterday was effectively a rest day. More accurately, it was a “drink beer and rest day” while waiting for the Visitor Center to open. We packed up a little late because the... [read more]
Apr
20
2017
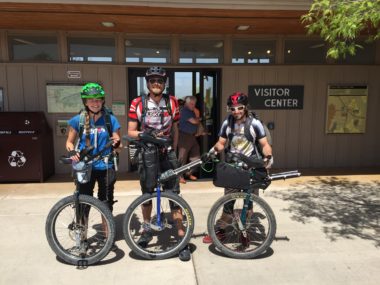
The Arizona Trail on Unicycle: Day 10: The Unexpected Rest Day
April 9, 2017 We got up and rode (I mean, walked…) the mile from the lake back to the dirt road and started continuing along the bypass. All the loud people from the night before... [read more]
Apr
19
2017
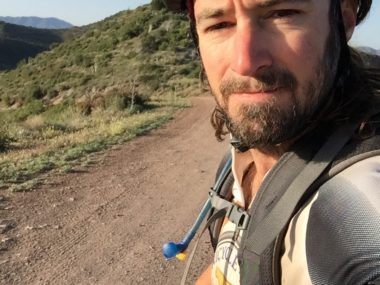
The Arizona Trail on Unicycle: Day 9, The Hang Man
April 8, 2017 We woke up and got an early start and were rolling by about 7AM. We chatted again with our neighbors and gave them some demo riding while Jamey bummed some coffee from... [read more]
Apr
18
2017
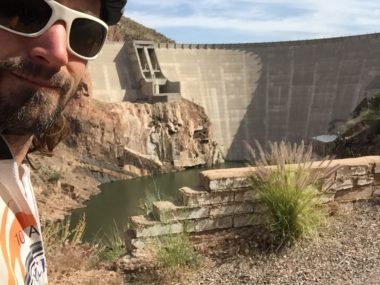
The Arizona Trail on Unicycle: Day 8, Cops Called on Us
April 7, 2017 We left the “hotel” a bit early so we could get to the Superior post office right as they opened. On the previous day, the hotel owner was so kind to let... [read more]
Apr
13
2017
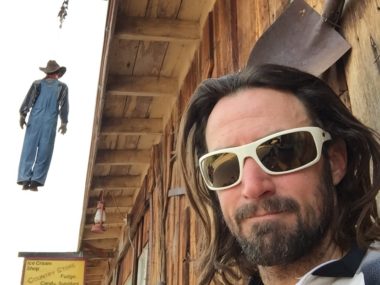
The Arizona Trail on Unicycle: Day 7: Mexican Food for Dinner
April 6, 2017 As you may recall, we camped in a wash about two miles up from the river. A solid ten mile hike straight up hill awaited us and I it was nice to... [read more]
Apr
12
2017
The Arizona Trail by Unicycle: Day 6, The Easy 10 Miles
April 5th, 2017 We camped by the road last night which was good and bad. It was good because the access was easy, we had pizza delivered, and it was relatively flat. It was bad... [read more]
Apr
11
2017
The Arizona Trail by Unicycle: Day 5: Did somebody order a pizza?
April 4, 2017 Wind howling through a 15 foot cactus makes an interesting sound. I imagine the wind is screaming in pain and wishing it never encountered the cactus. At least, that is how I... [read more]
Apr
10
2017
The Arizona Trail by Unicycle: Day 4: Going Commando
April 3, 2017 My upper butt was incredibly sore from the past few days so I started my day a little bit earlier than Jamey and Rebekka so I could take it easy. That meant... [read more]
Apr
9
2017
The Arizona Trail by Unicycle: Day 3, The Unicycle Savior
April 2, 2017 Snakes in the bed! I tend to have a reoccurring dream that there is a snake somewhere in my bed. I’ll be sleeping and all of a sudden start tearing covers off... [read more]
Apr
9
2017
The Arizona Trail on Unicycle: Day 2, Into the White
It Saturday, April 1, 2017 We woke up to no wind, calm skies and a slight overcast. This should be the recipe for a good day in Arizona, right? Well, think again… Jamey, Rebekka and... [read more]
Apr
7
2017
The Arizona Trail on Unicycle: Day 1, The Mountain Lion
March 31, 2017 The Mountain Lion This isn’t what you are thinking. Well, I hope you are thinking about a unicyclist getting chased by a mountain lion on some tiny dirt trails, frantically waving their... [read more]
Apr
7
2017
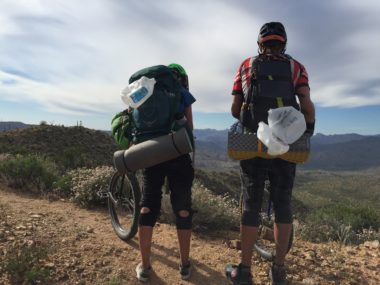
Unipacking last training ride
One last hill climb before I head out to the Arizona Trail!
Mar
30
2017
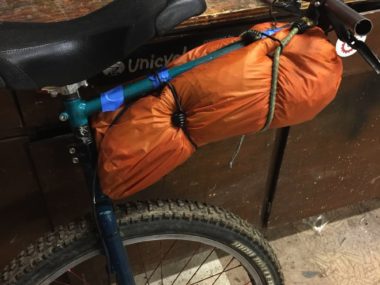
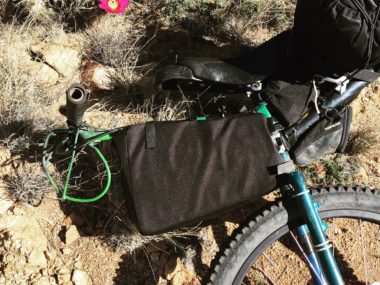
Unipacking: Designing Panniers for a Unicycle: Prototypes
After a bunch of research, and making a new handlebar, I decided to start up on some prototype unicycle panniers and bags. First I just strapped my tent under the front bar; this was a... [read more]
Mar
26
2017
Unipacking: Designing Panniers for a Unicycle: Research
In April 2017 I’m planning on riding the Arizona Trail via my unicycle. This will involve unipacking: carrying all my supplies for a self supported off road adventure over the course of hundreds of miles.... [read more]
Mar
25
2017

Unipacking: Custom unicycle handlebar, part 2
In my last post, I talked about the setup and why I want to make a new handle bar for my KH26 geared mountain unicycle. Here’s a video detailing the construction of it:
Mar
25
2017
Unicycle handlebar evolution over time
Here’s a few pictures that go with my last video and post: My previous KH26 handlebar that I had made: Older handlebars: Post modifications, and experimenting with strapping a tent under it:... [read more]
Mar
24
2017
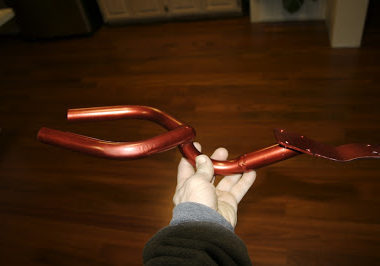
Unipacking: Creating a custom unicycle handlebar, part 1
I’ve been making custom unicycle handlebars for over 10 years. I’ve refined the shape quite a bit over the years and I always have been tending to go wider and wider, and more mountain bike... [read more]
Mar
24
2017
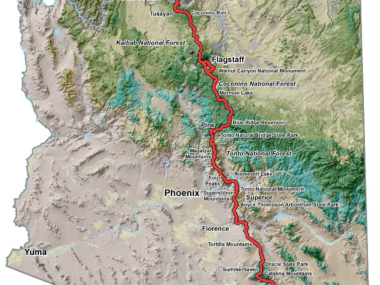
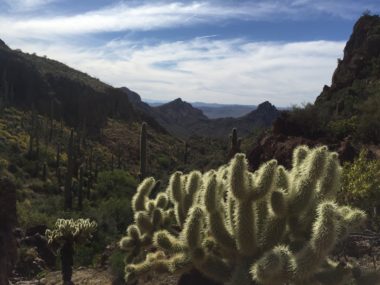
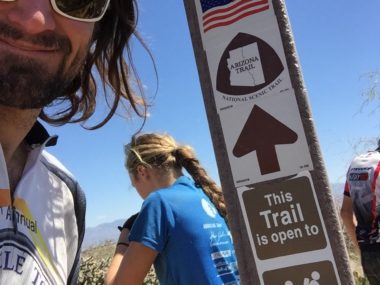
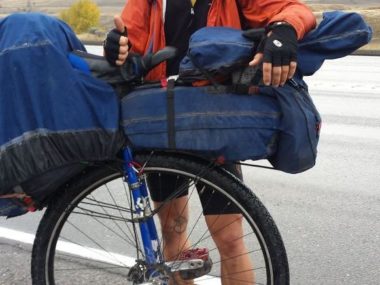
The Arizona Trail on Unicycle
I’m in the process of preparing for my next big trip: The Arizona Trail on Unicycle. The Arizona Trail splits the state almost in half with an 800 mile vertical line from Mexico all the way... [read more]
Mar
9
2017
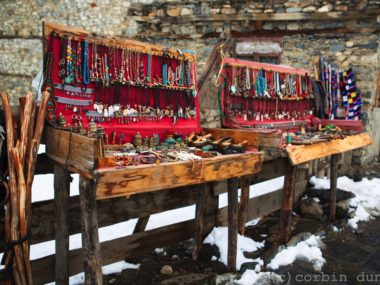
Photography: Nepal Wares
I took this picture back in April of 2015 when I was in Nepal on a unicycle tour through the Annapurna mountain range. Vendors with portable shops would setup their items to sell alongside the... [read more]
Feb
10
2017
Adventures of Corbin: Japan, Starring Lexi
Late last year, Lexi told me that she wanted to go to Japan. I’ve always wanted to go to Japan and I figured this would be an awesome opportunity for me to go check out... [read more]
Feb
8
2017
Plug Bug: Crash update.
Back in October 2016 my electric VW bug was rear ended: http://www.corbinstreehouse.com/blog/2016/10/plug-bug-the-bug-is-squished-i-was-rear-ended/ I was super sad, and I’ve had to deal with the insurance side of things. In the end, the bug has been declared... [read more]
Feb
7
2017
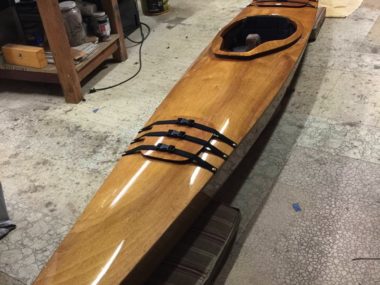
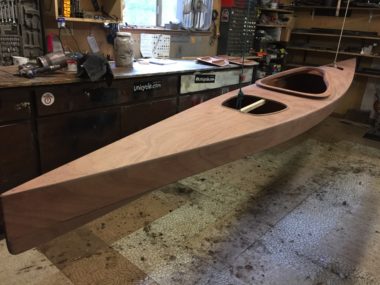
Chesapeake 16LT Kayak: It hits the water
In October 2016 I got a wooden kayak kit. In February 2017 it finally hit the water! It took a little longer than I expected, but I’m happy with the result! Here I am taking... [read more]
Feb
7
2017
Chesapeake 16LT Kayak: Part 14 – Finished.
Happy days are here! Actually, most all my days are happy days, but the kayak is done! I installed the seat and hatch straps. The seat is just some foam glued in, and in the... [read more]
Feb
1
2017
Chesapeake 16LT Kayak: Part 13: Wet sanding
I did some wet sanding on the kayak after the first coat. The directions say to use 400 grit, but I wet sanded the first two coats with 320, and then switched to 400 for... [read more]
Jan
27
2017
Chesapeake 16LT Kayak Part 12: Starting the finishing process
I was gone for a few weeks in Japan, so progress on the kayak has been slow. I’m back to doing some work on it. First I had to sand it a ton. 80 grit,... [read more]
Jan
22
2017
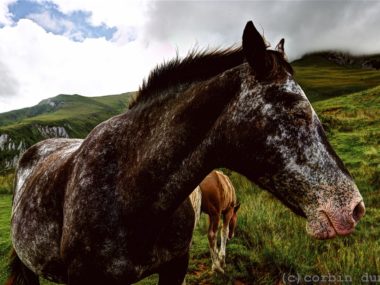
Photography: Speckles the horse.
More horse photos! This photo was also taken when I was going through Spain heading from Barcelona up to San Sebastian with a few friends last summer. We touched through France, and I’m pretty sure... [read more]
Jan
17
2017
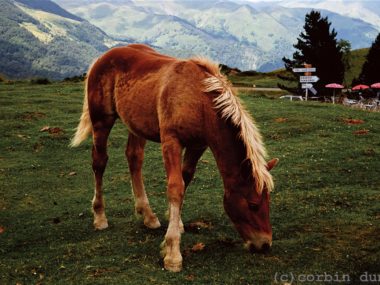
Photography: Horse eating grass in France
I ran around with my tripod taking tons of pictures of the horses on a windy hilltop in France last summer. I used Photomatix to generate this picture by combining five different exposures. Use Photomatix! I... [read more]
Jan
16
2017
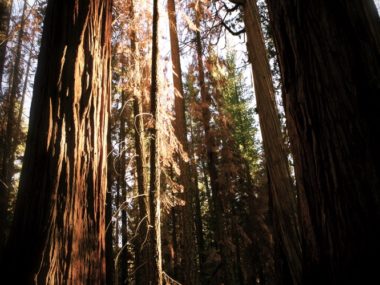
Photography: Redwoods in Yosemite
I used to not really like hiking. There seemed to be no purpose to it; you followed a trail for no real rhyme or reason and usually ended up back where you started. I never... [read more]
Jan
10
2017
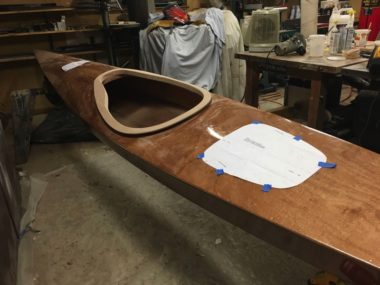
Building the Chesapeake 16LT Kayak: Part 11 – Mark and Cut Holes
Okay! Progress is happening when I have spare time. I glued on the cowling around the opening, cut it to fit and sanded it smooth. The glue-up was a bit tricky…I didn’t have quite enough... [read more]
Dec
5
2016
As an Amazon Associate I earn from qualifying purchases.
(c) 2008-2026 Corbin Dunn
Subscribe to RSS feeds for entries.
52 queries. 0.258 seconds.