Purple Epoxy Butterfly Bowl – CNC Woodworking
This project idea started out with WiseBond epoxy asking if I wanted to try out some of their new color shifting mica powders. I’m part of their affiliate program, which allows me to get a small kick back whenever someone buys some epoxy through my affiliate link. This is a great symbiotic relationship for me and them: I help promote their products and in return I can get a small amount of money that helps support my website and YouTube channel. The amount is truly minuscule, but I like that my site can support itself.
The company offered to send me some epoxy and mica powder to test out. Part of the deal was to make a project with the epoxy and feature their product in one of the photos, and to run a contest for some of my followers to win some epoxy. I’m running the contest over on my Redwood Monkey Workshop Facebook page; it expires Friday August 14th, 2020.
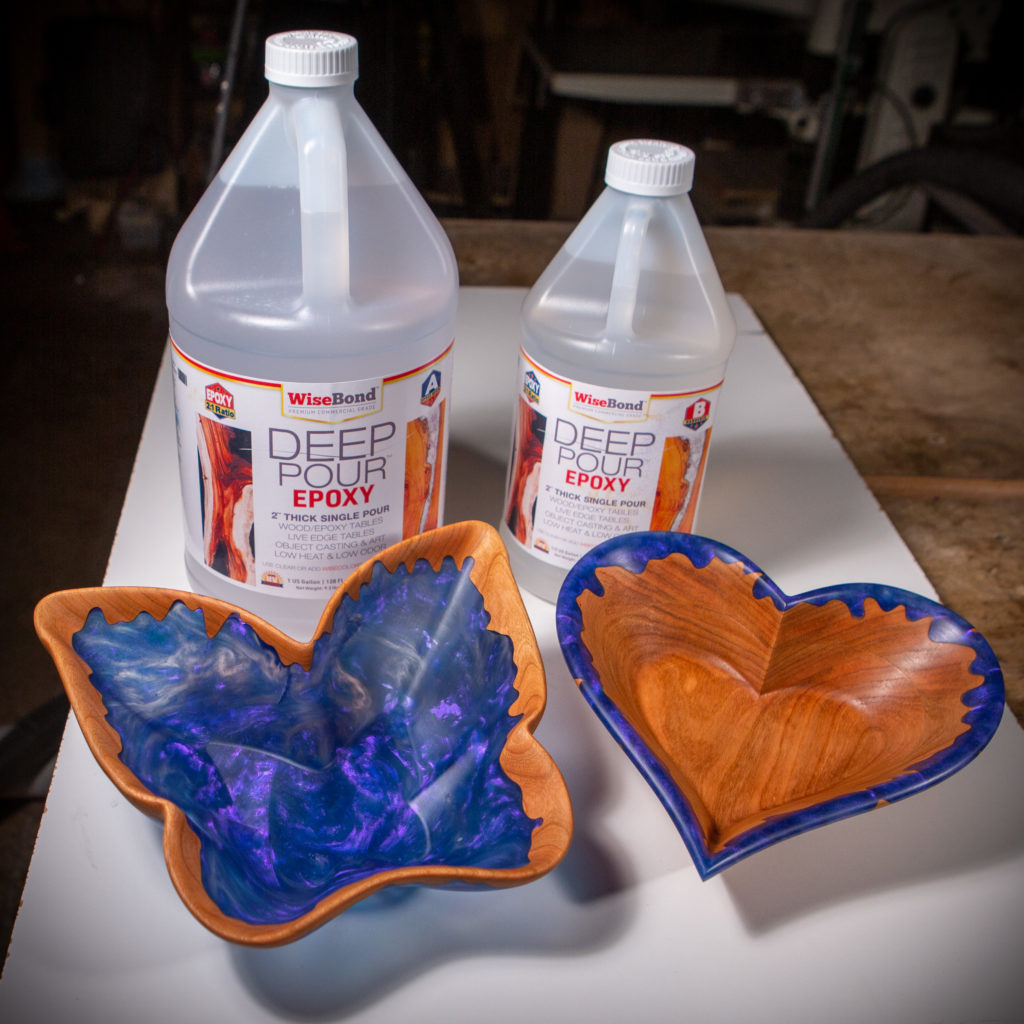
My idea was to do an “inverse” drip butterfly bowl. My original drip butterfly bowls have the epoxy on the top and wood on the bottom, as seen below:
I thought it would be cool to flip this around, but the disadvantage is that it would require a lot of epoxy. This particular project used about 90 ounces, which is quite a bit! I knew I was going to be pushing the limits of the “deep pour” epoxy. It typically can be poured at up to 2″ thick, and my casting was almost 3″ thick. However, that included the wood, and I thought that it would be shallow enough in other areas for this to be okay. I measured the thickness on another piece and determined it was about 2 3/4″ to 2 7/8″ deep in some areas. This is a good 3/4″-7/8″ deeper than I should have poured the epoxy.
My workshop was nearly 80F when I did the pour. This isn’t too hot for epoxy, but warmer temperatures make it cure faster, and the excess depth proved to be too deep. The epoxy started to go exothermic, bubbling up and cracking some parts. This is NOT the fault of the epoxy, but because I poured it too deep in too hot of a temperature. The piece was notably warm on the outside of the mold and I measured the temperature of the epoxy at about 140-150F with an infrared thermometer. I put a fan on it, but at this point it was too late.
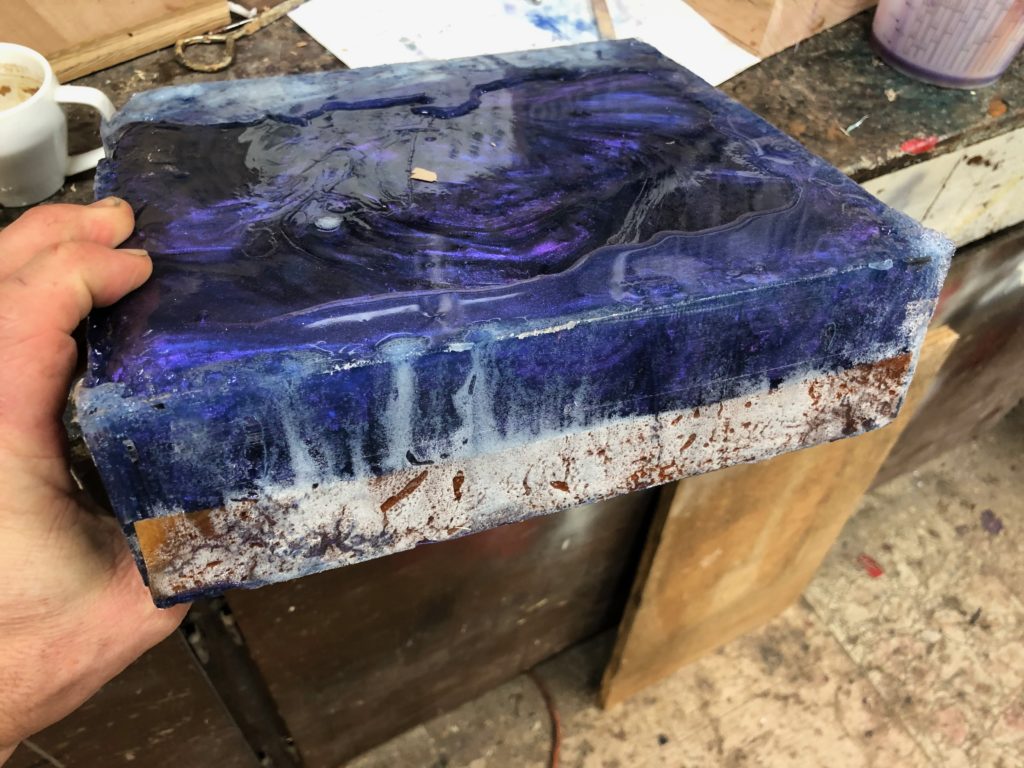
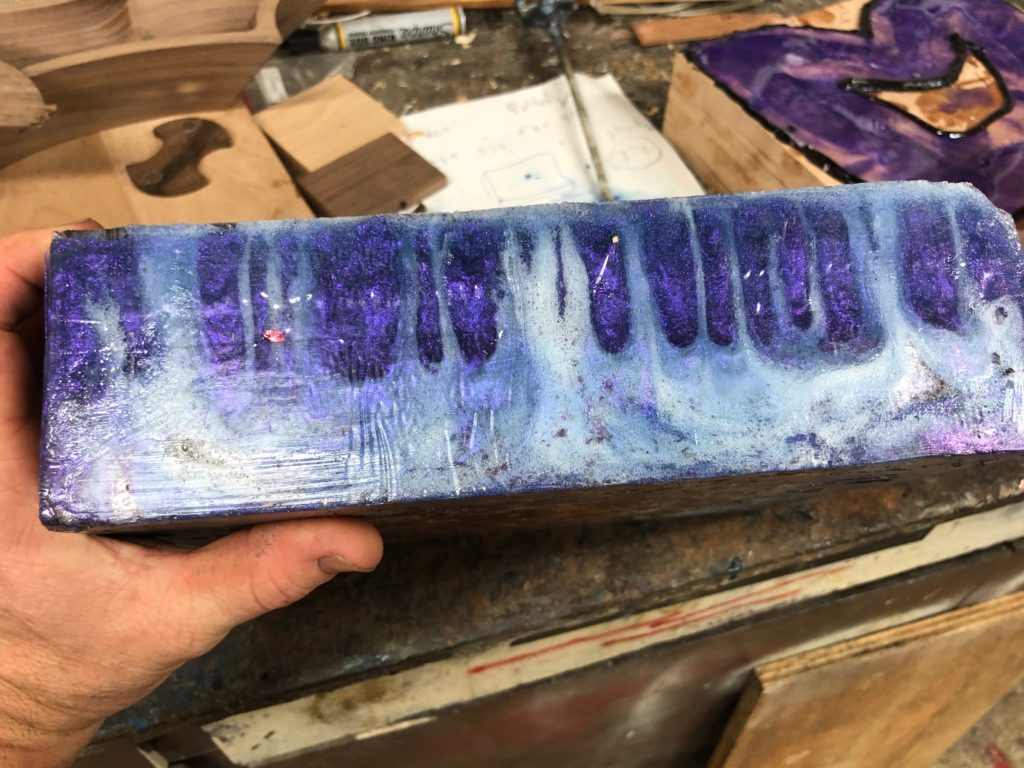
I decided to go ahead and finish off this piece, and I’m glad I did! It turned out fabulous, but does have a few small cracks in it due to the exothermic reaction that happened.
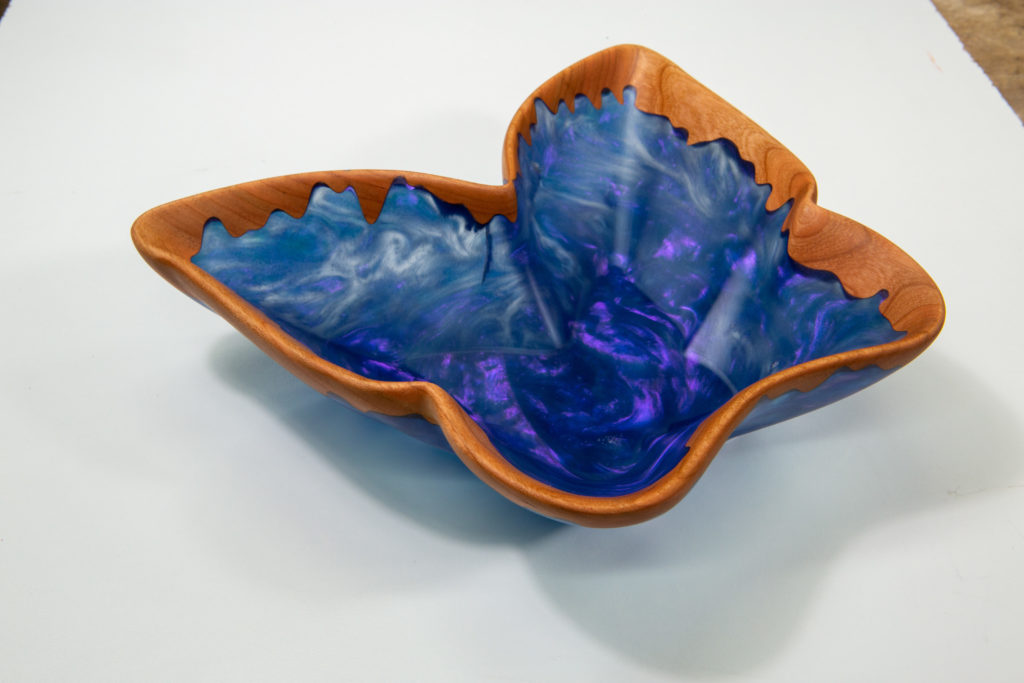
The concept is really cool! I have a few more that I’m toying around with. I am pretty sure I can pour at up to 2 3/4″ deep if I cool the piece constantly via a fan and pour it at a cooler temperature (65F).
Note that I’m more agnostic to specific epoxy brands, and I don’t really recommend one brand over another, regardless of the affiliate program. WiseBond definitely has a good value-for-price in their deep pour and countertop epoxies; check out my epoxy comparison page for more information on the various brands and prices.