Ceiling and Roof Construction – Truckee Workshop Part 10
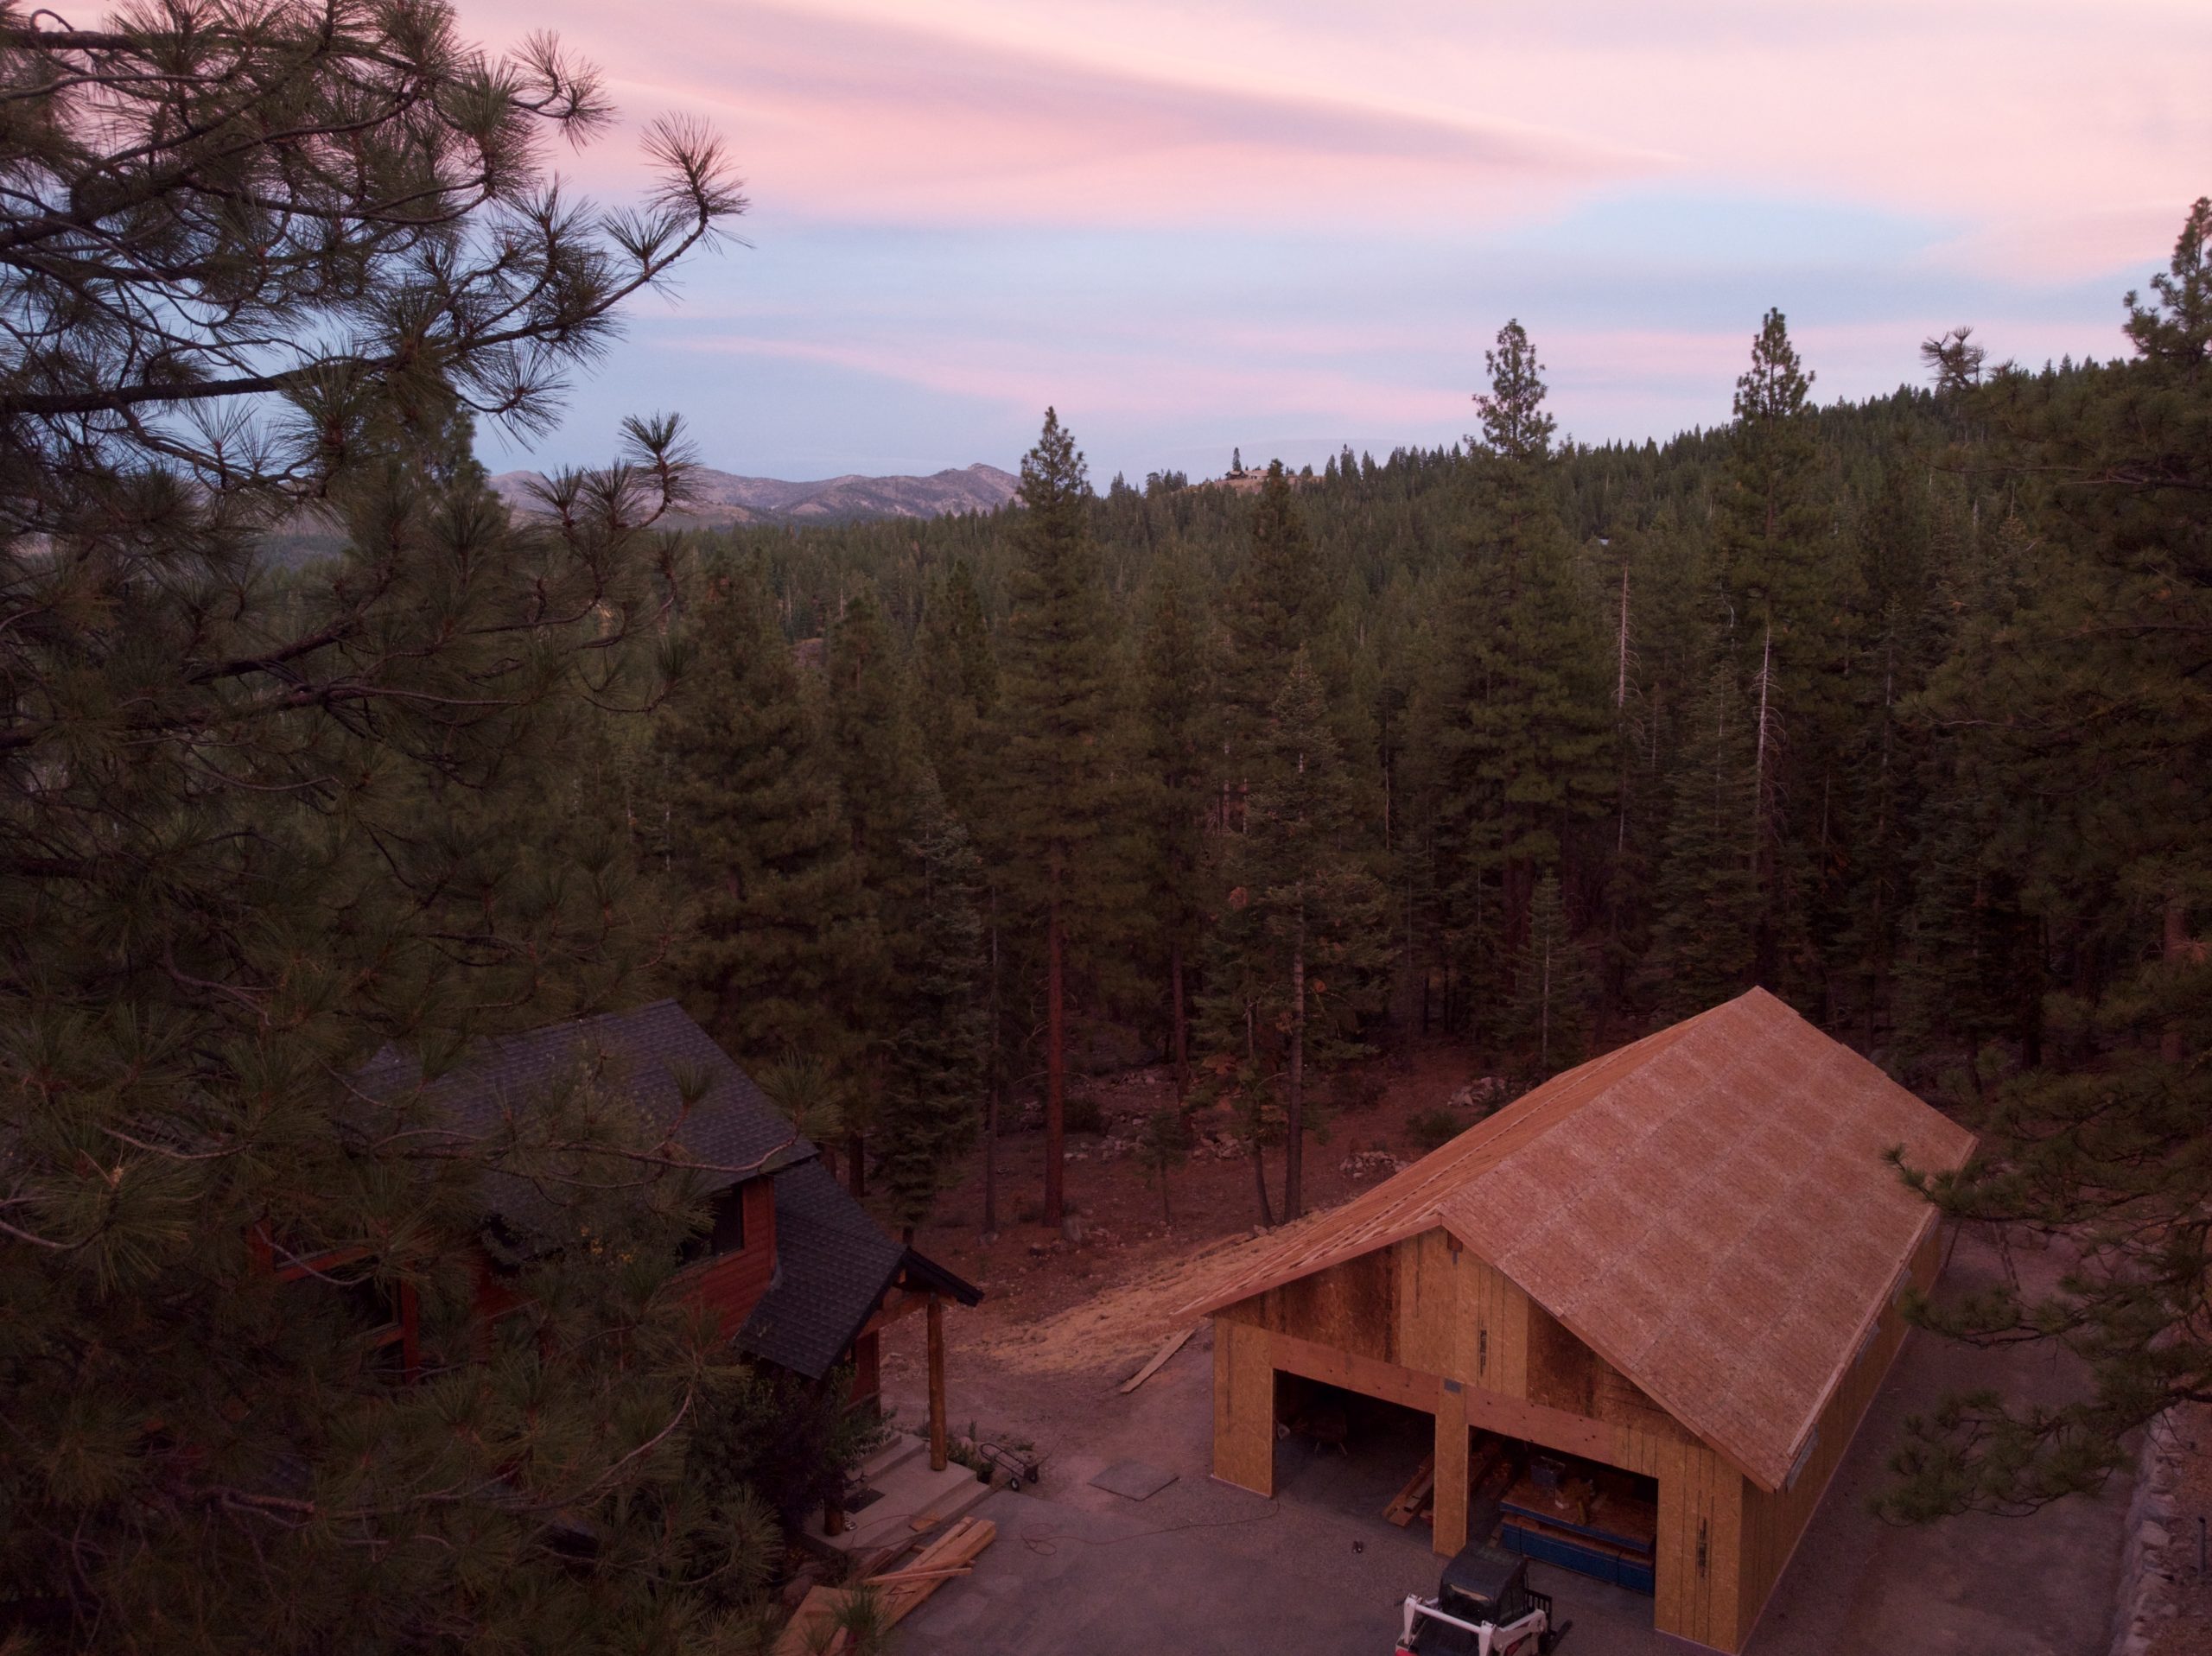
In the last post I talked about how we go the steel posts and main beam installed for my garage/shop project. I was working really hard to get the roof on and keep everything dry, but in the midst of waiting we did get two rainstorms. There wasn’t much I could do, and it didn’t seem to cause any problems to the wood.
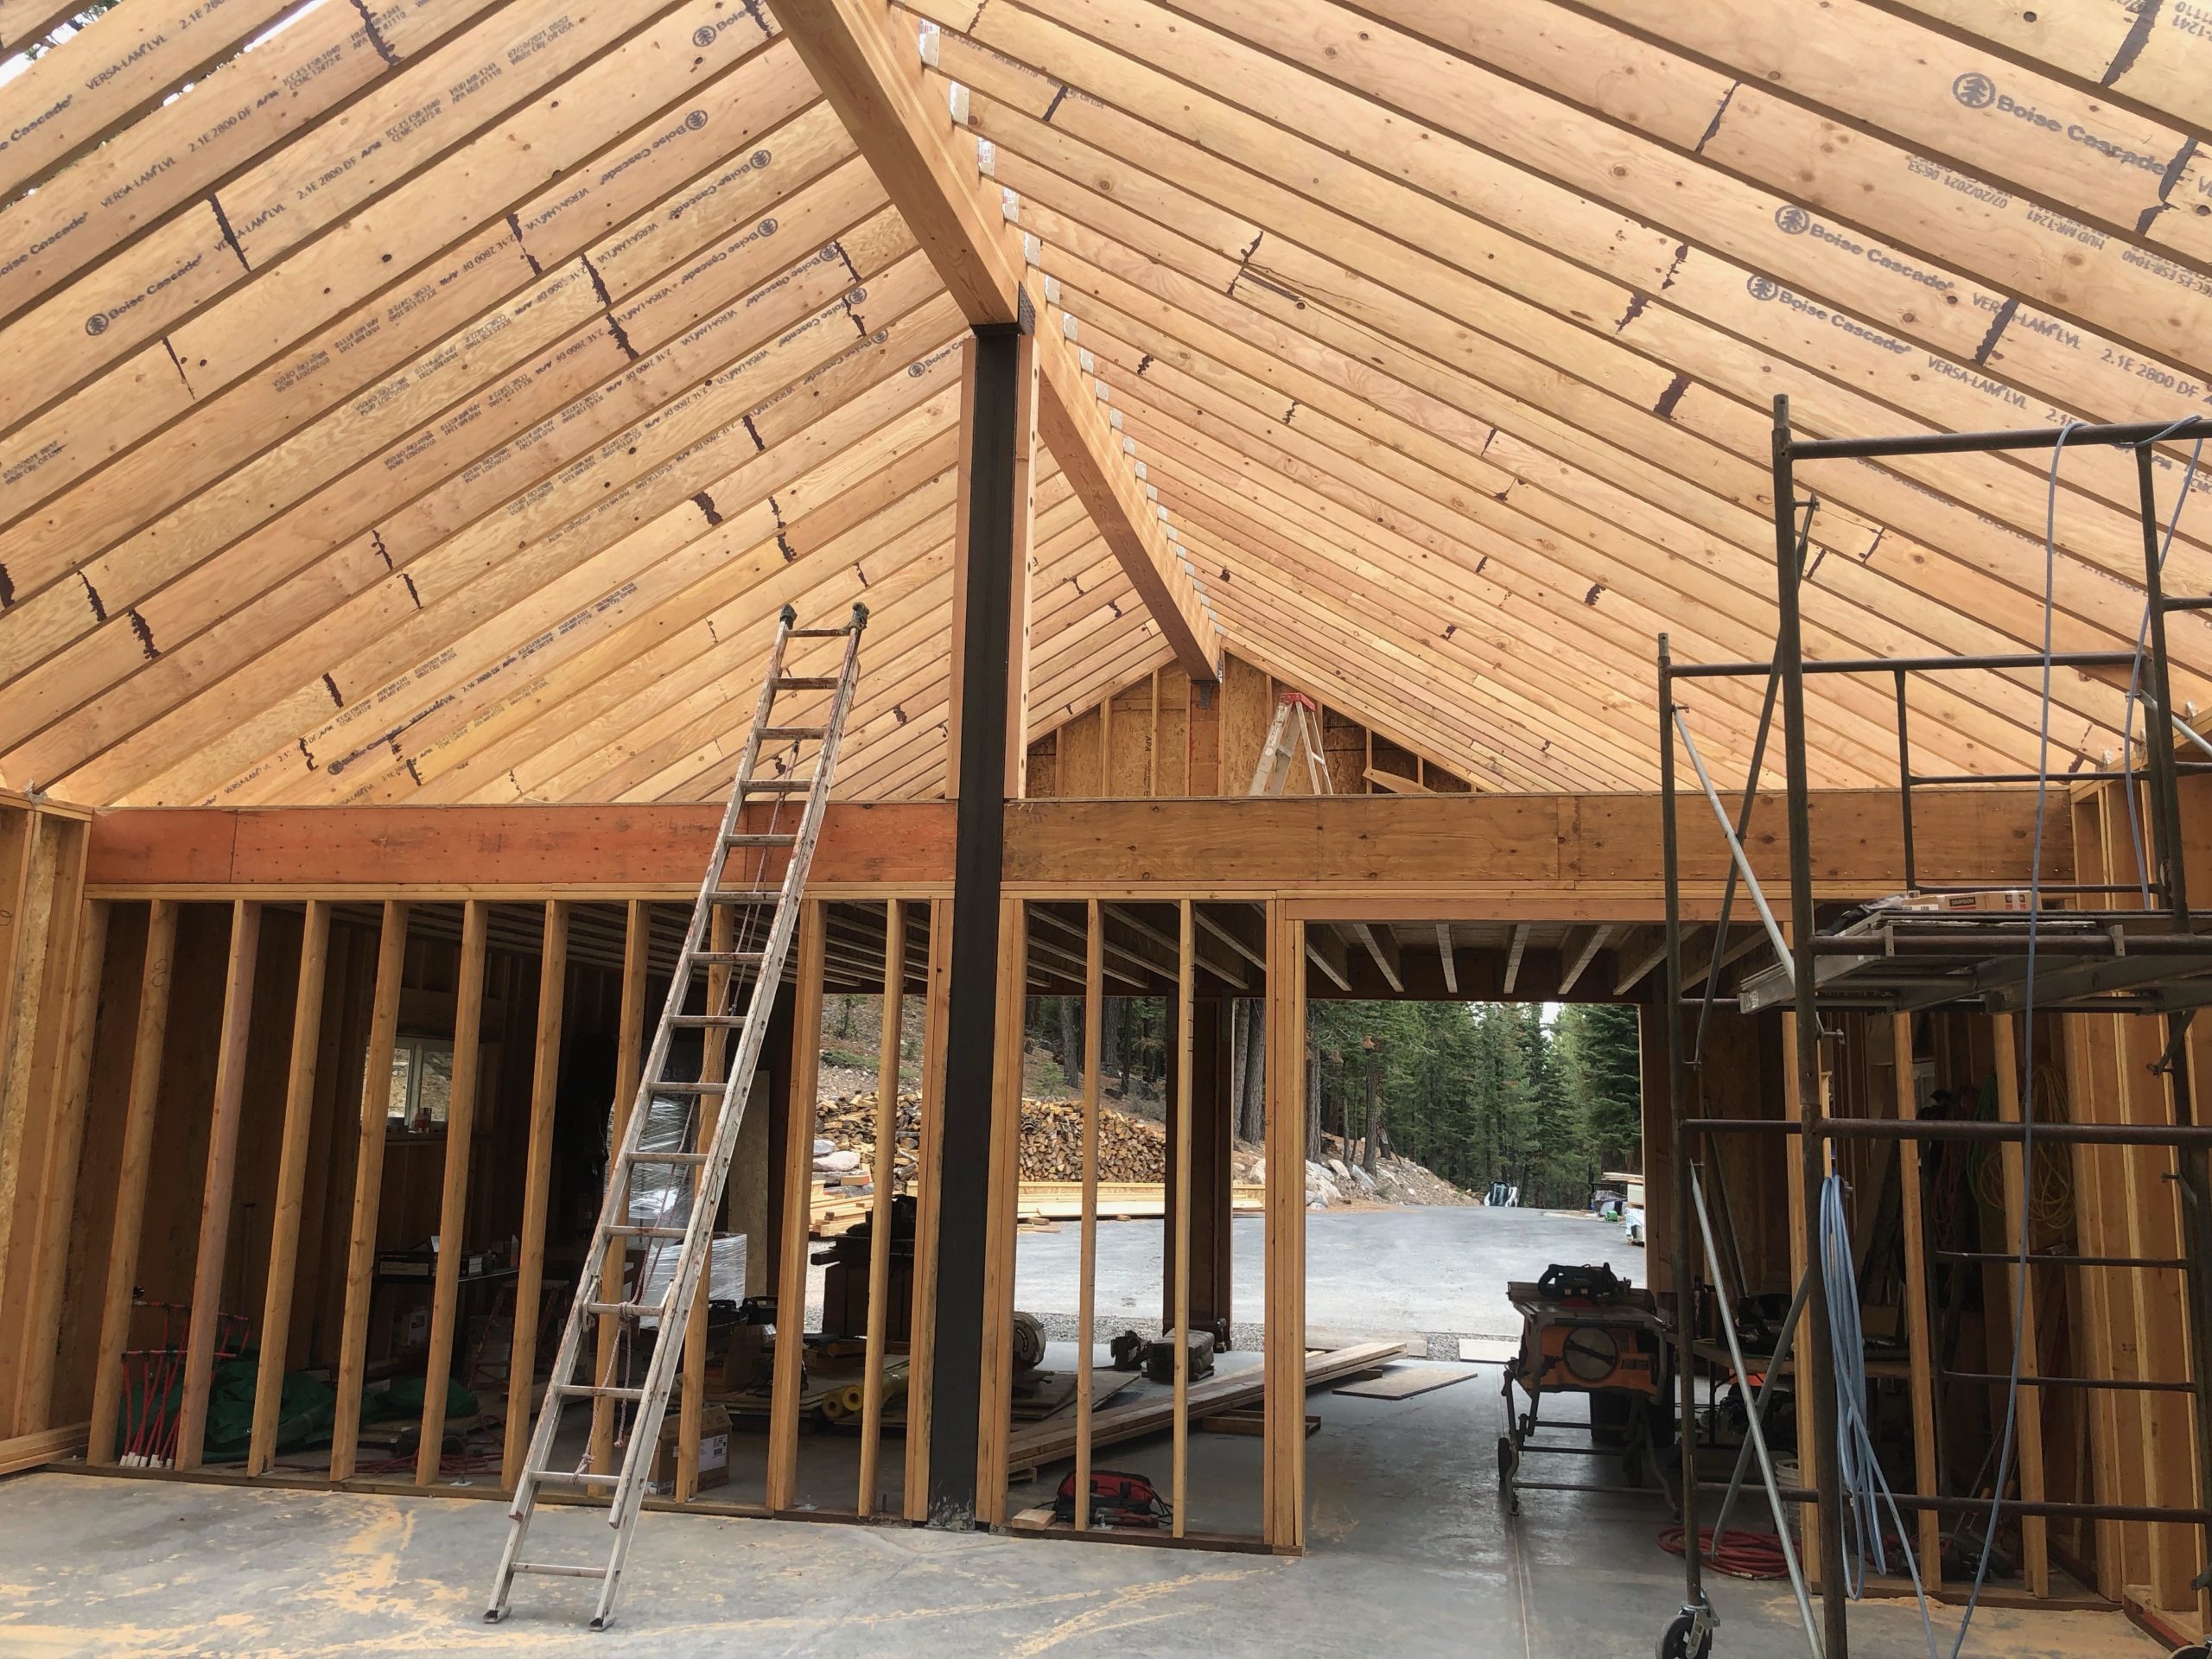
The next step was to finish building the ceiling/floor above the 2-car garage and the small back room on the left. The thought was to use the above attic area for storage, but to keep it open to allow me to easily move large pieces of wood up and down. I’m not sure I should say “easy” for moving slabs of wood, and it might involve some sort of chain lift system to do it.
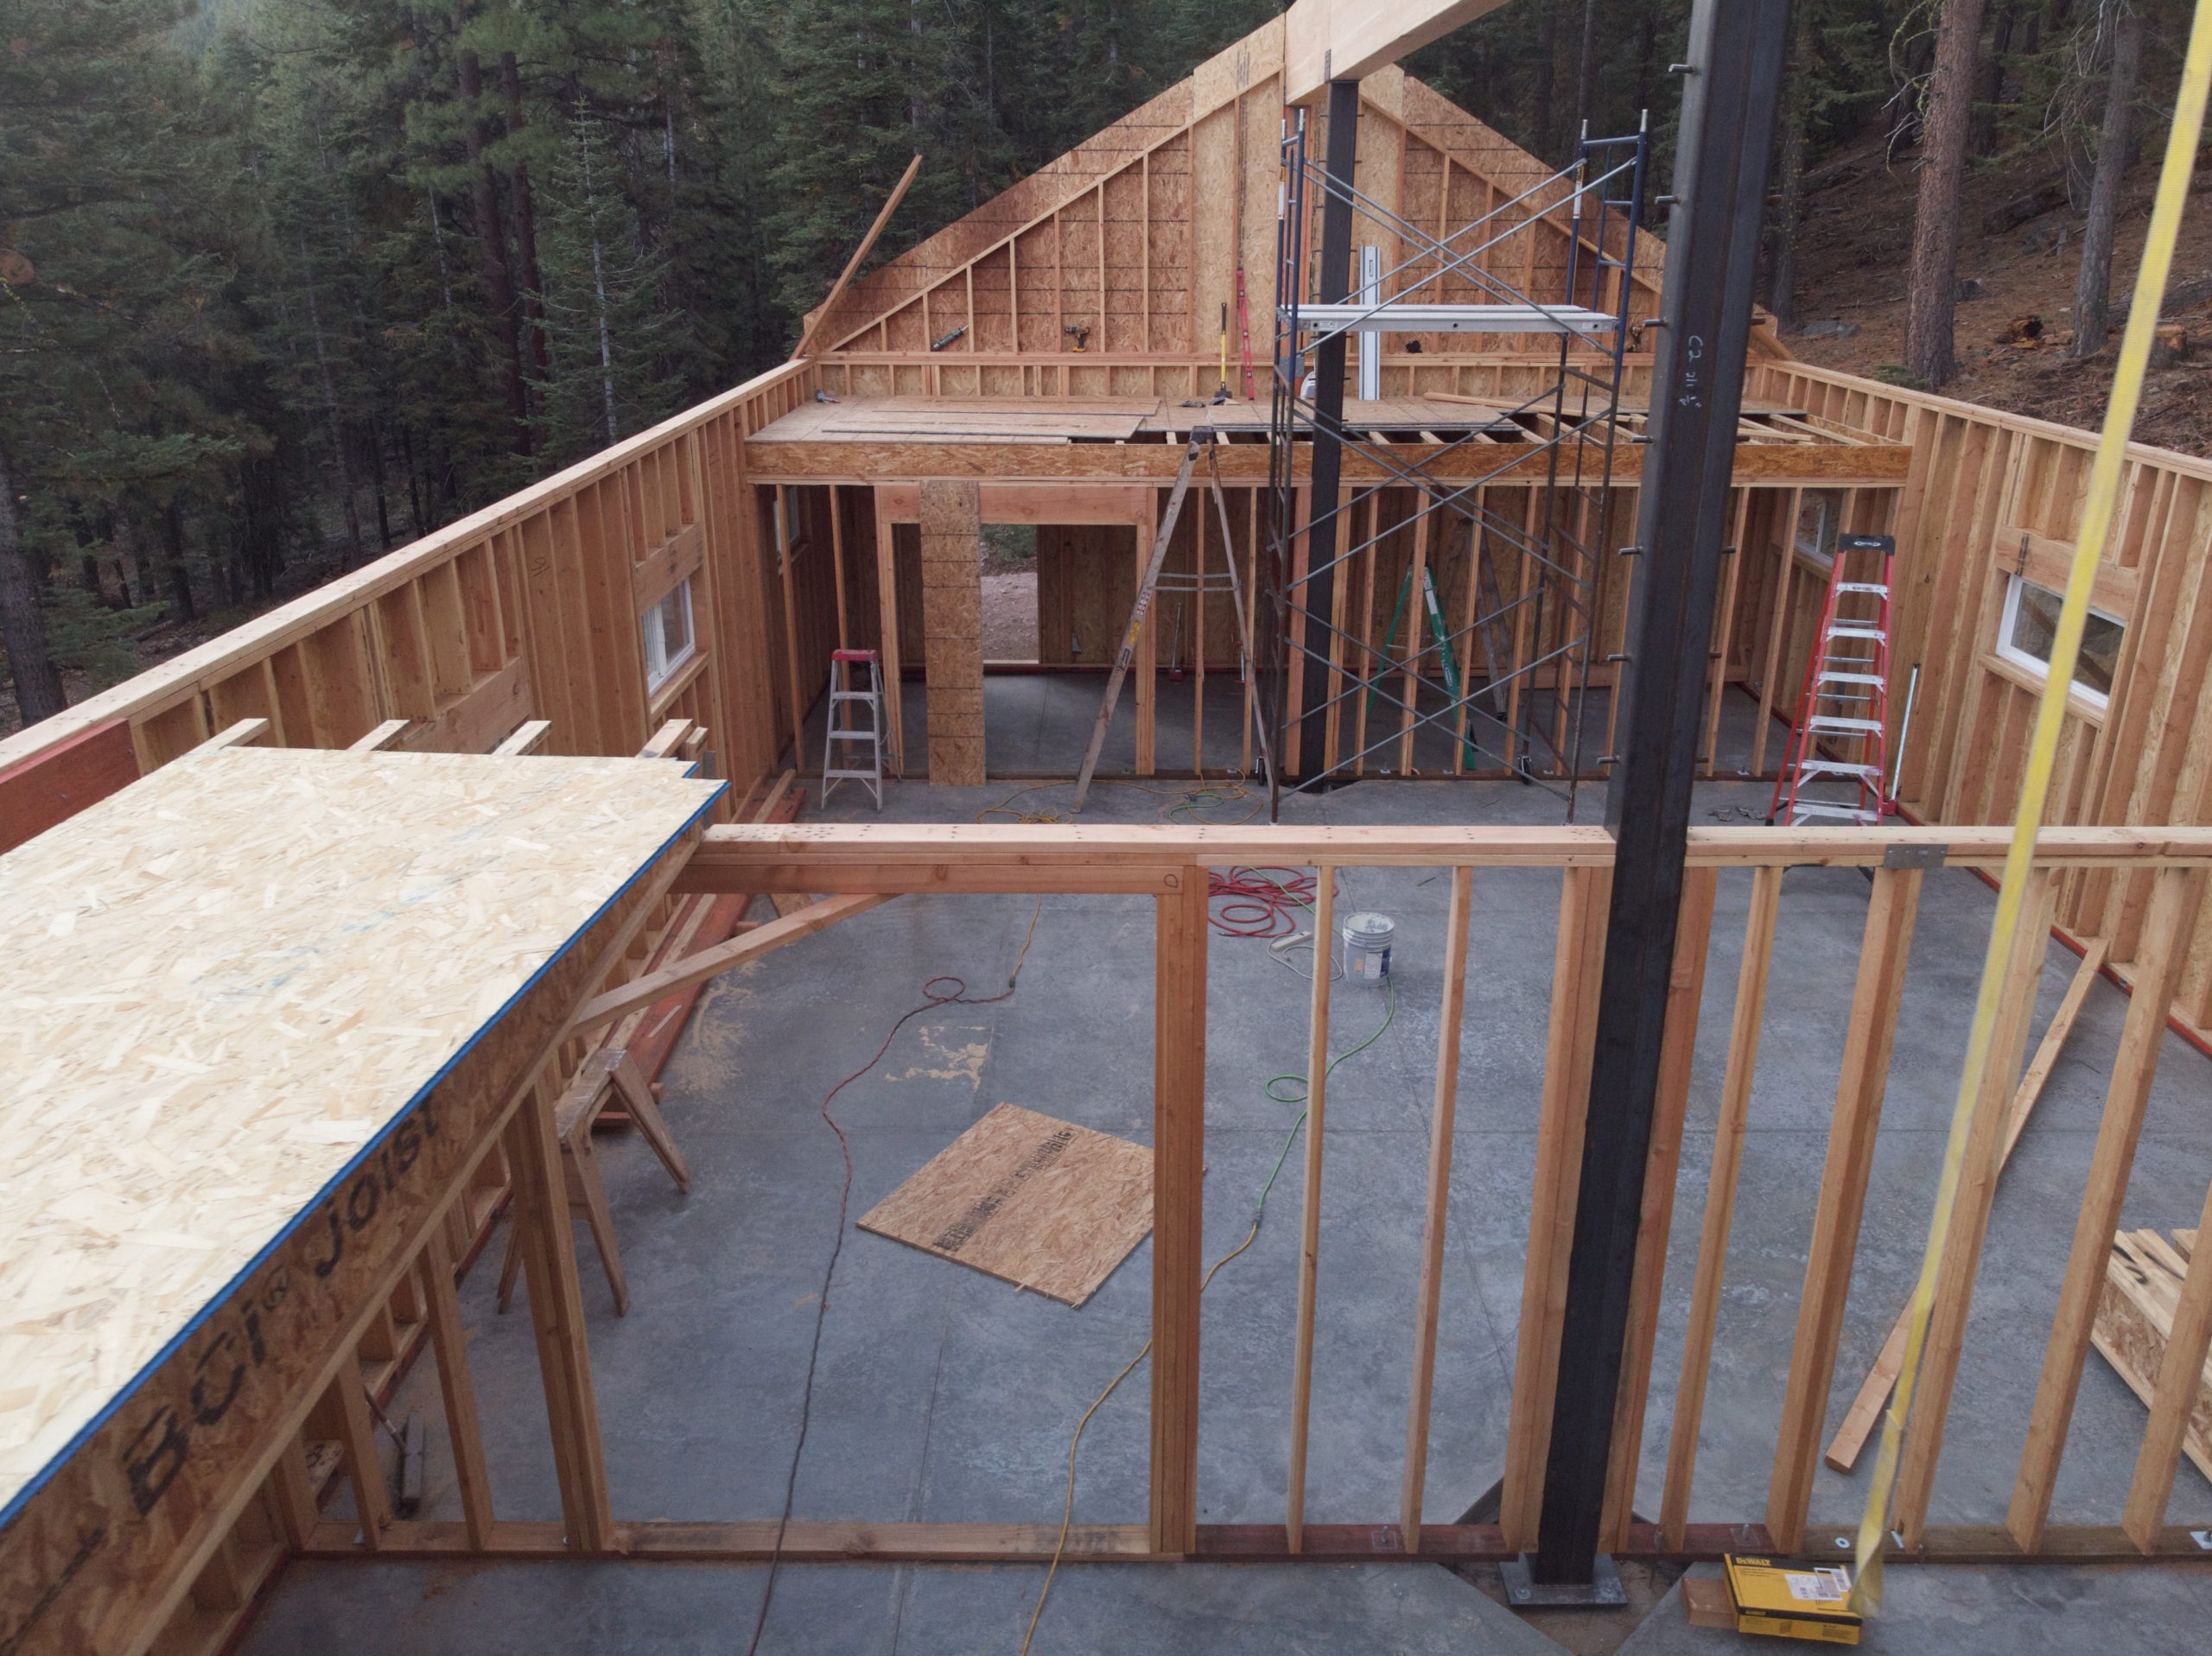
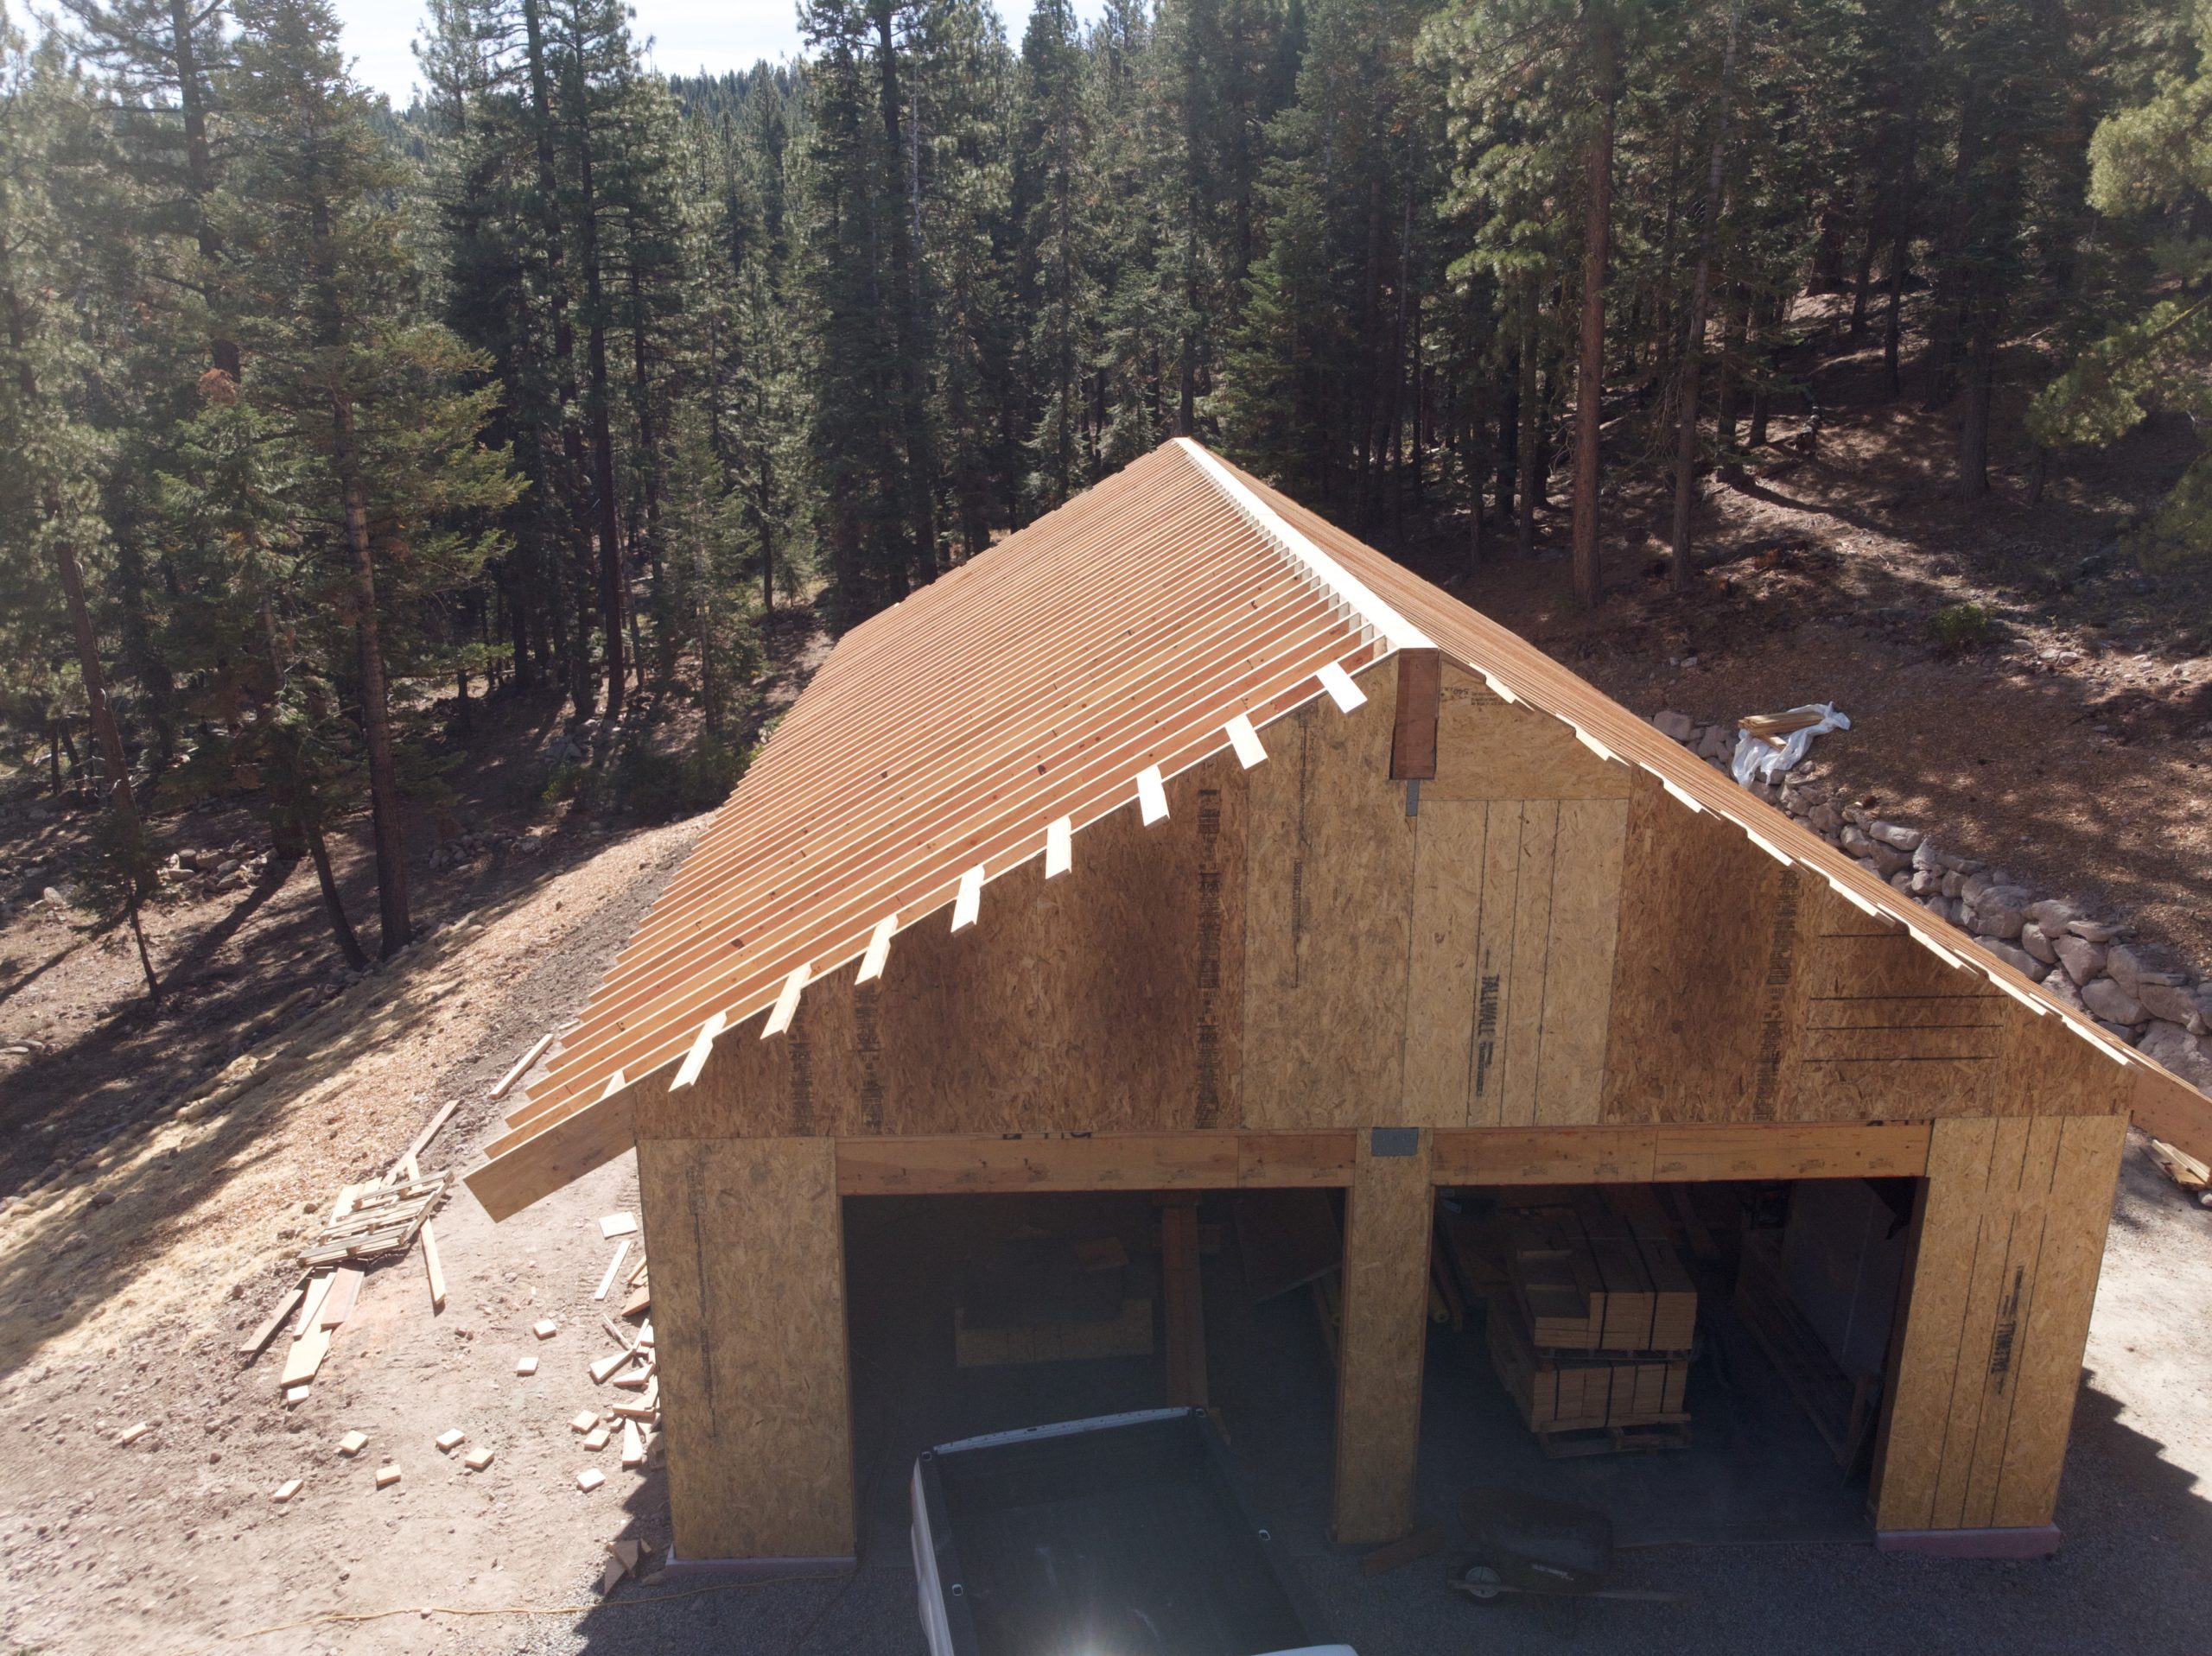
I got a lot of the floor joists on the smaller room installed by myself on a Sunday. The other ones were too long to manhandle solo, and Josh helped me work on those while the other guys did some auxiliary prep work on the gable end and rafters. We decided to do this upper flooring area before the roof to give us an area to stand on, and this turned out to be a great idea. The rafters were a full 14″ deep, 2″ wide LVL: laminated veneer lumber, which is incredibly heavy. We had to use four people to get them up; two of us where on the ground to get it on the edge of the wall. The third person was inside the building to receive the end, and the fourth (usually Neville) was up at the beam to tack nail it on. It involved a lot of communication to ensure no one got hurt, and each rafter was cut individually to make sure it all lined up just right. This involved the top angle and a “birds mouth” to sit on the top edge of the wall.
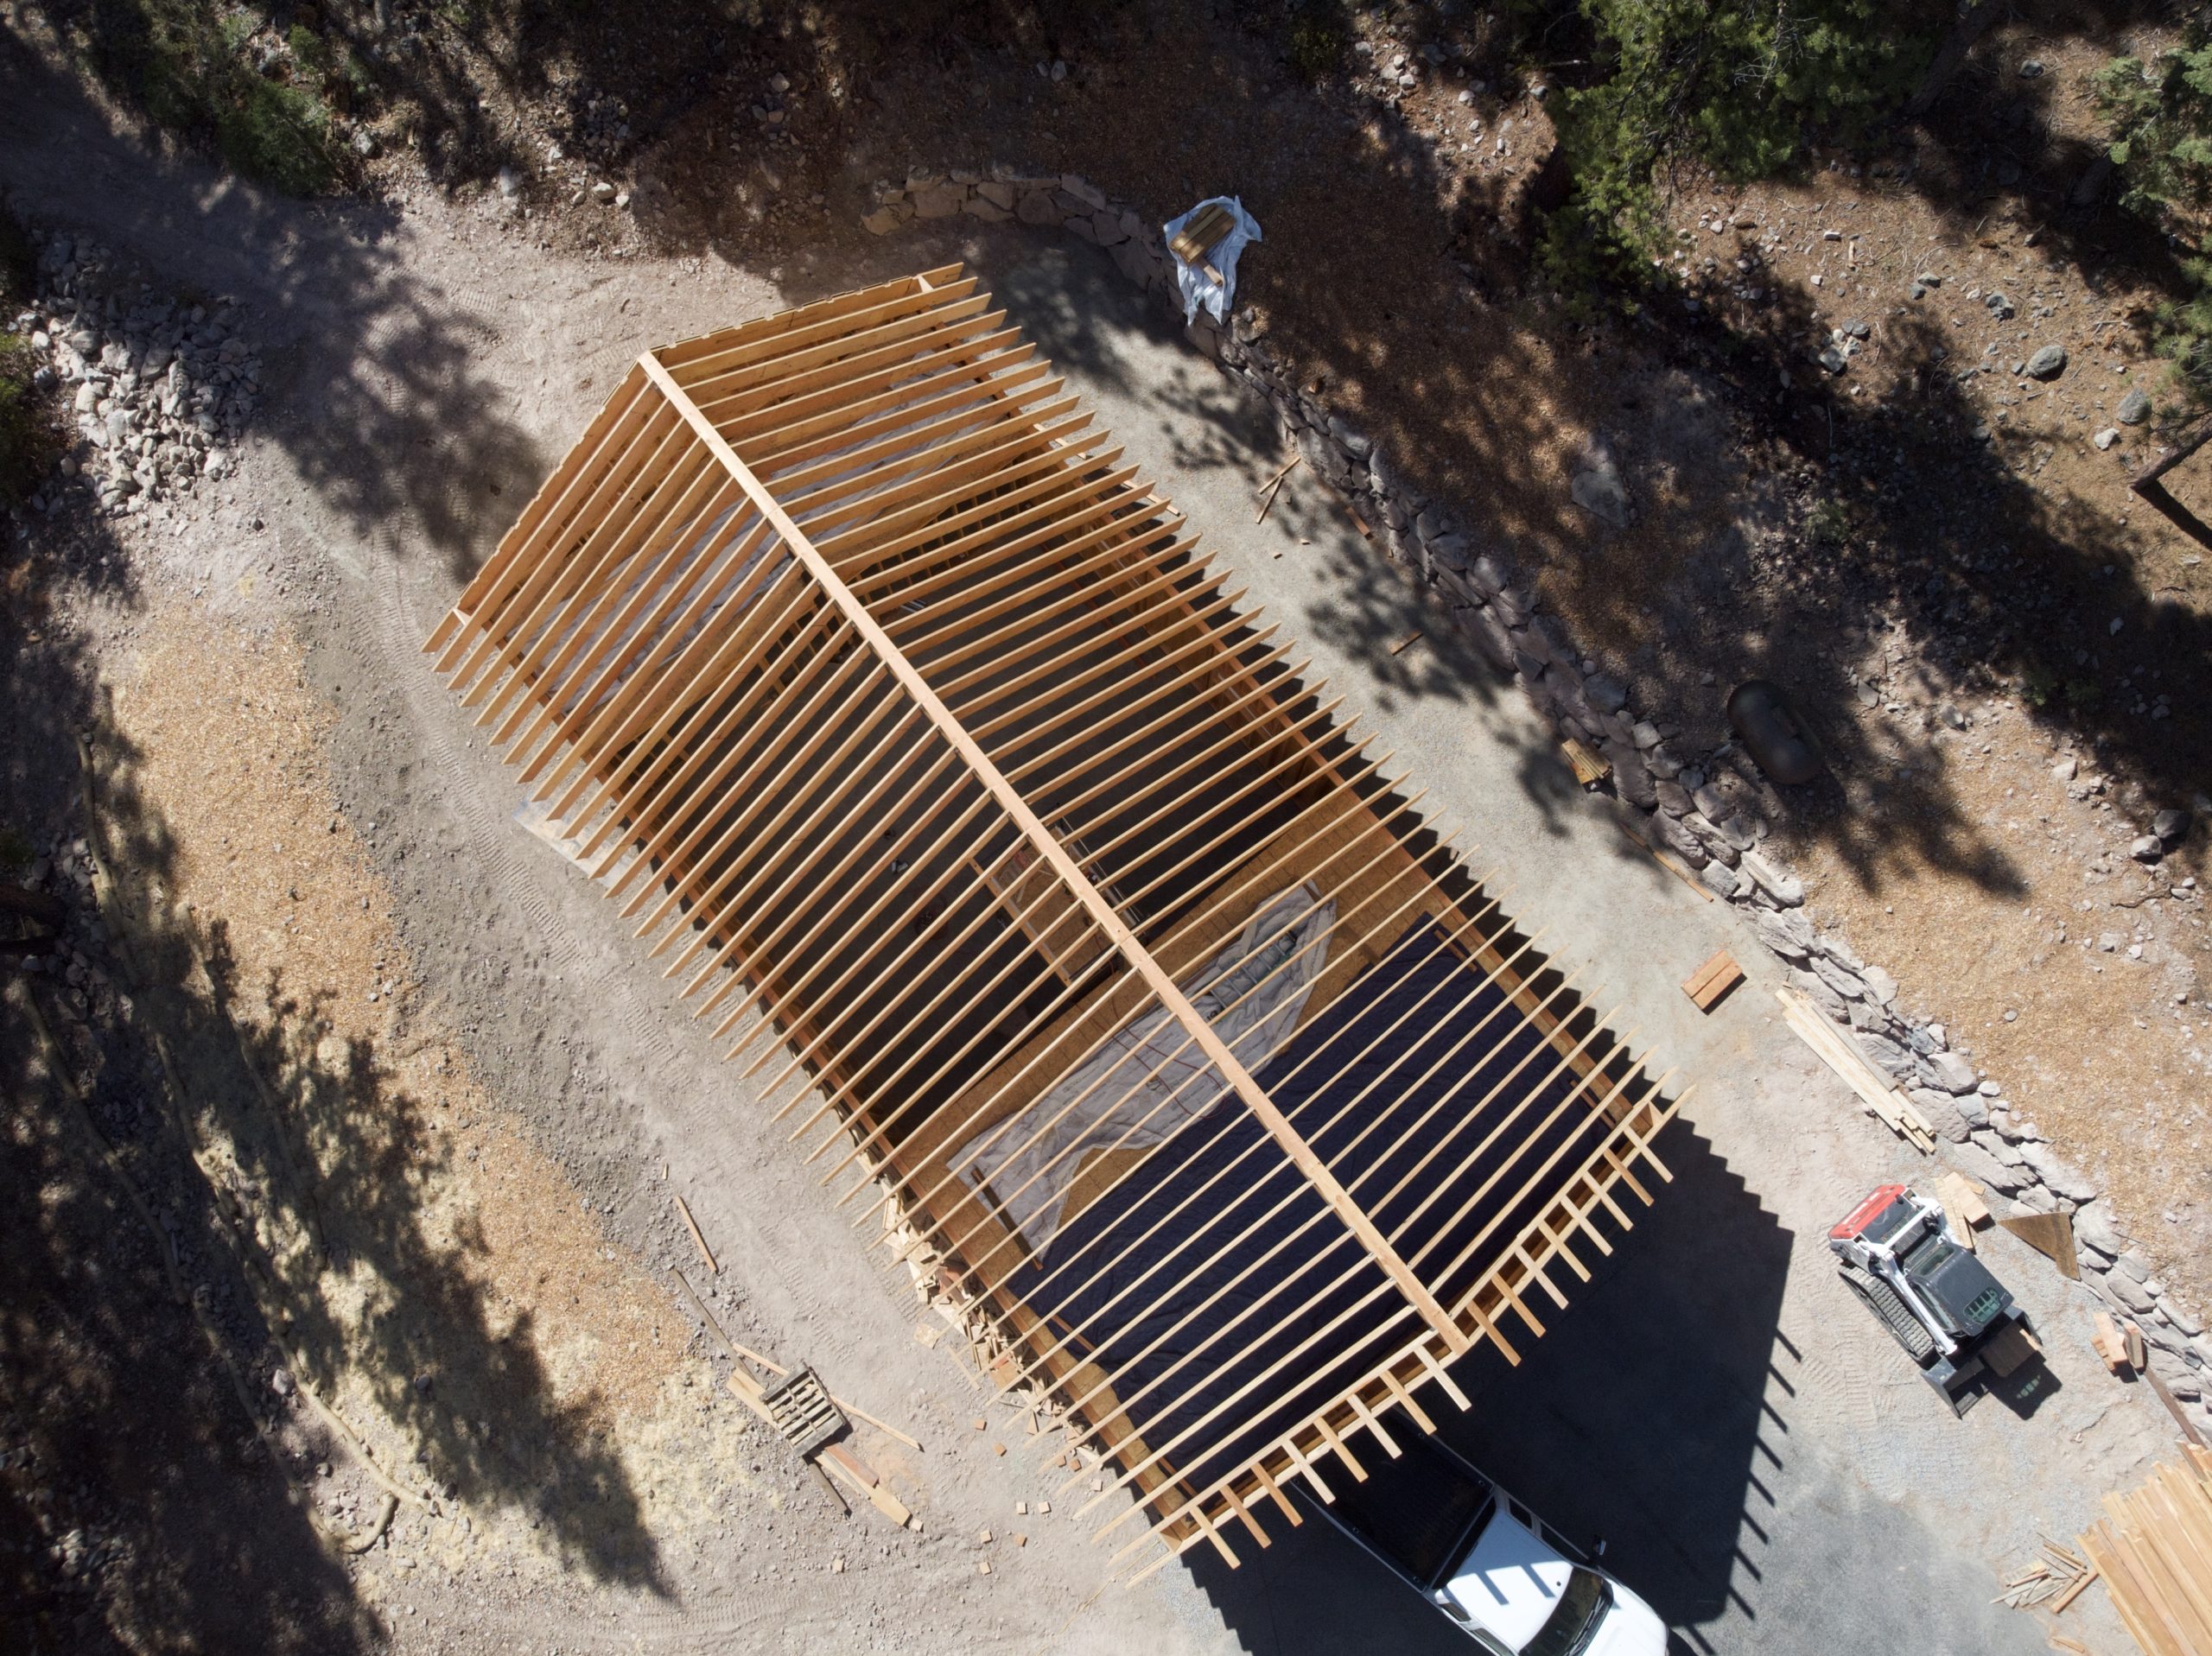
Once the rafters were installed we could work on the details, and the details always take a lot of time! I nailed on all nearly all the rafter hangers. I used a “palm nailer” to do this, as the rafter gun we had couldn’t shoot the required 16D nails. A palm nailer is a little pneumatic tool that holds a nail in its barrel and pounds the nail into the wall; much faster and easier than using a hammer, and it allows you to get into tighter areas. Later the inspector told me the important part was probably the thickness of the nail, and we probably could have shot on thick 2.5″ joist nails instead of nailing no the full 3.5″ 16Ds. This would have saved me hours and hours of time, and my wrists got destroyed from the constant vibration of the palm nailer.
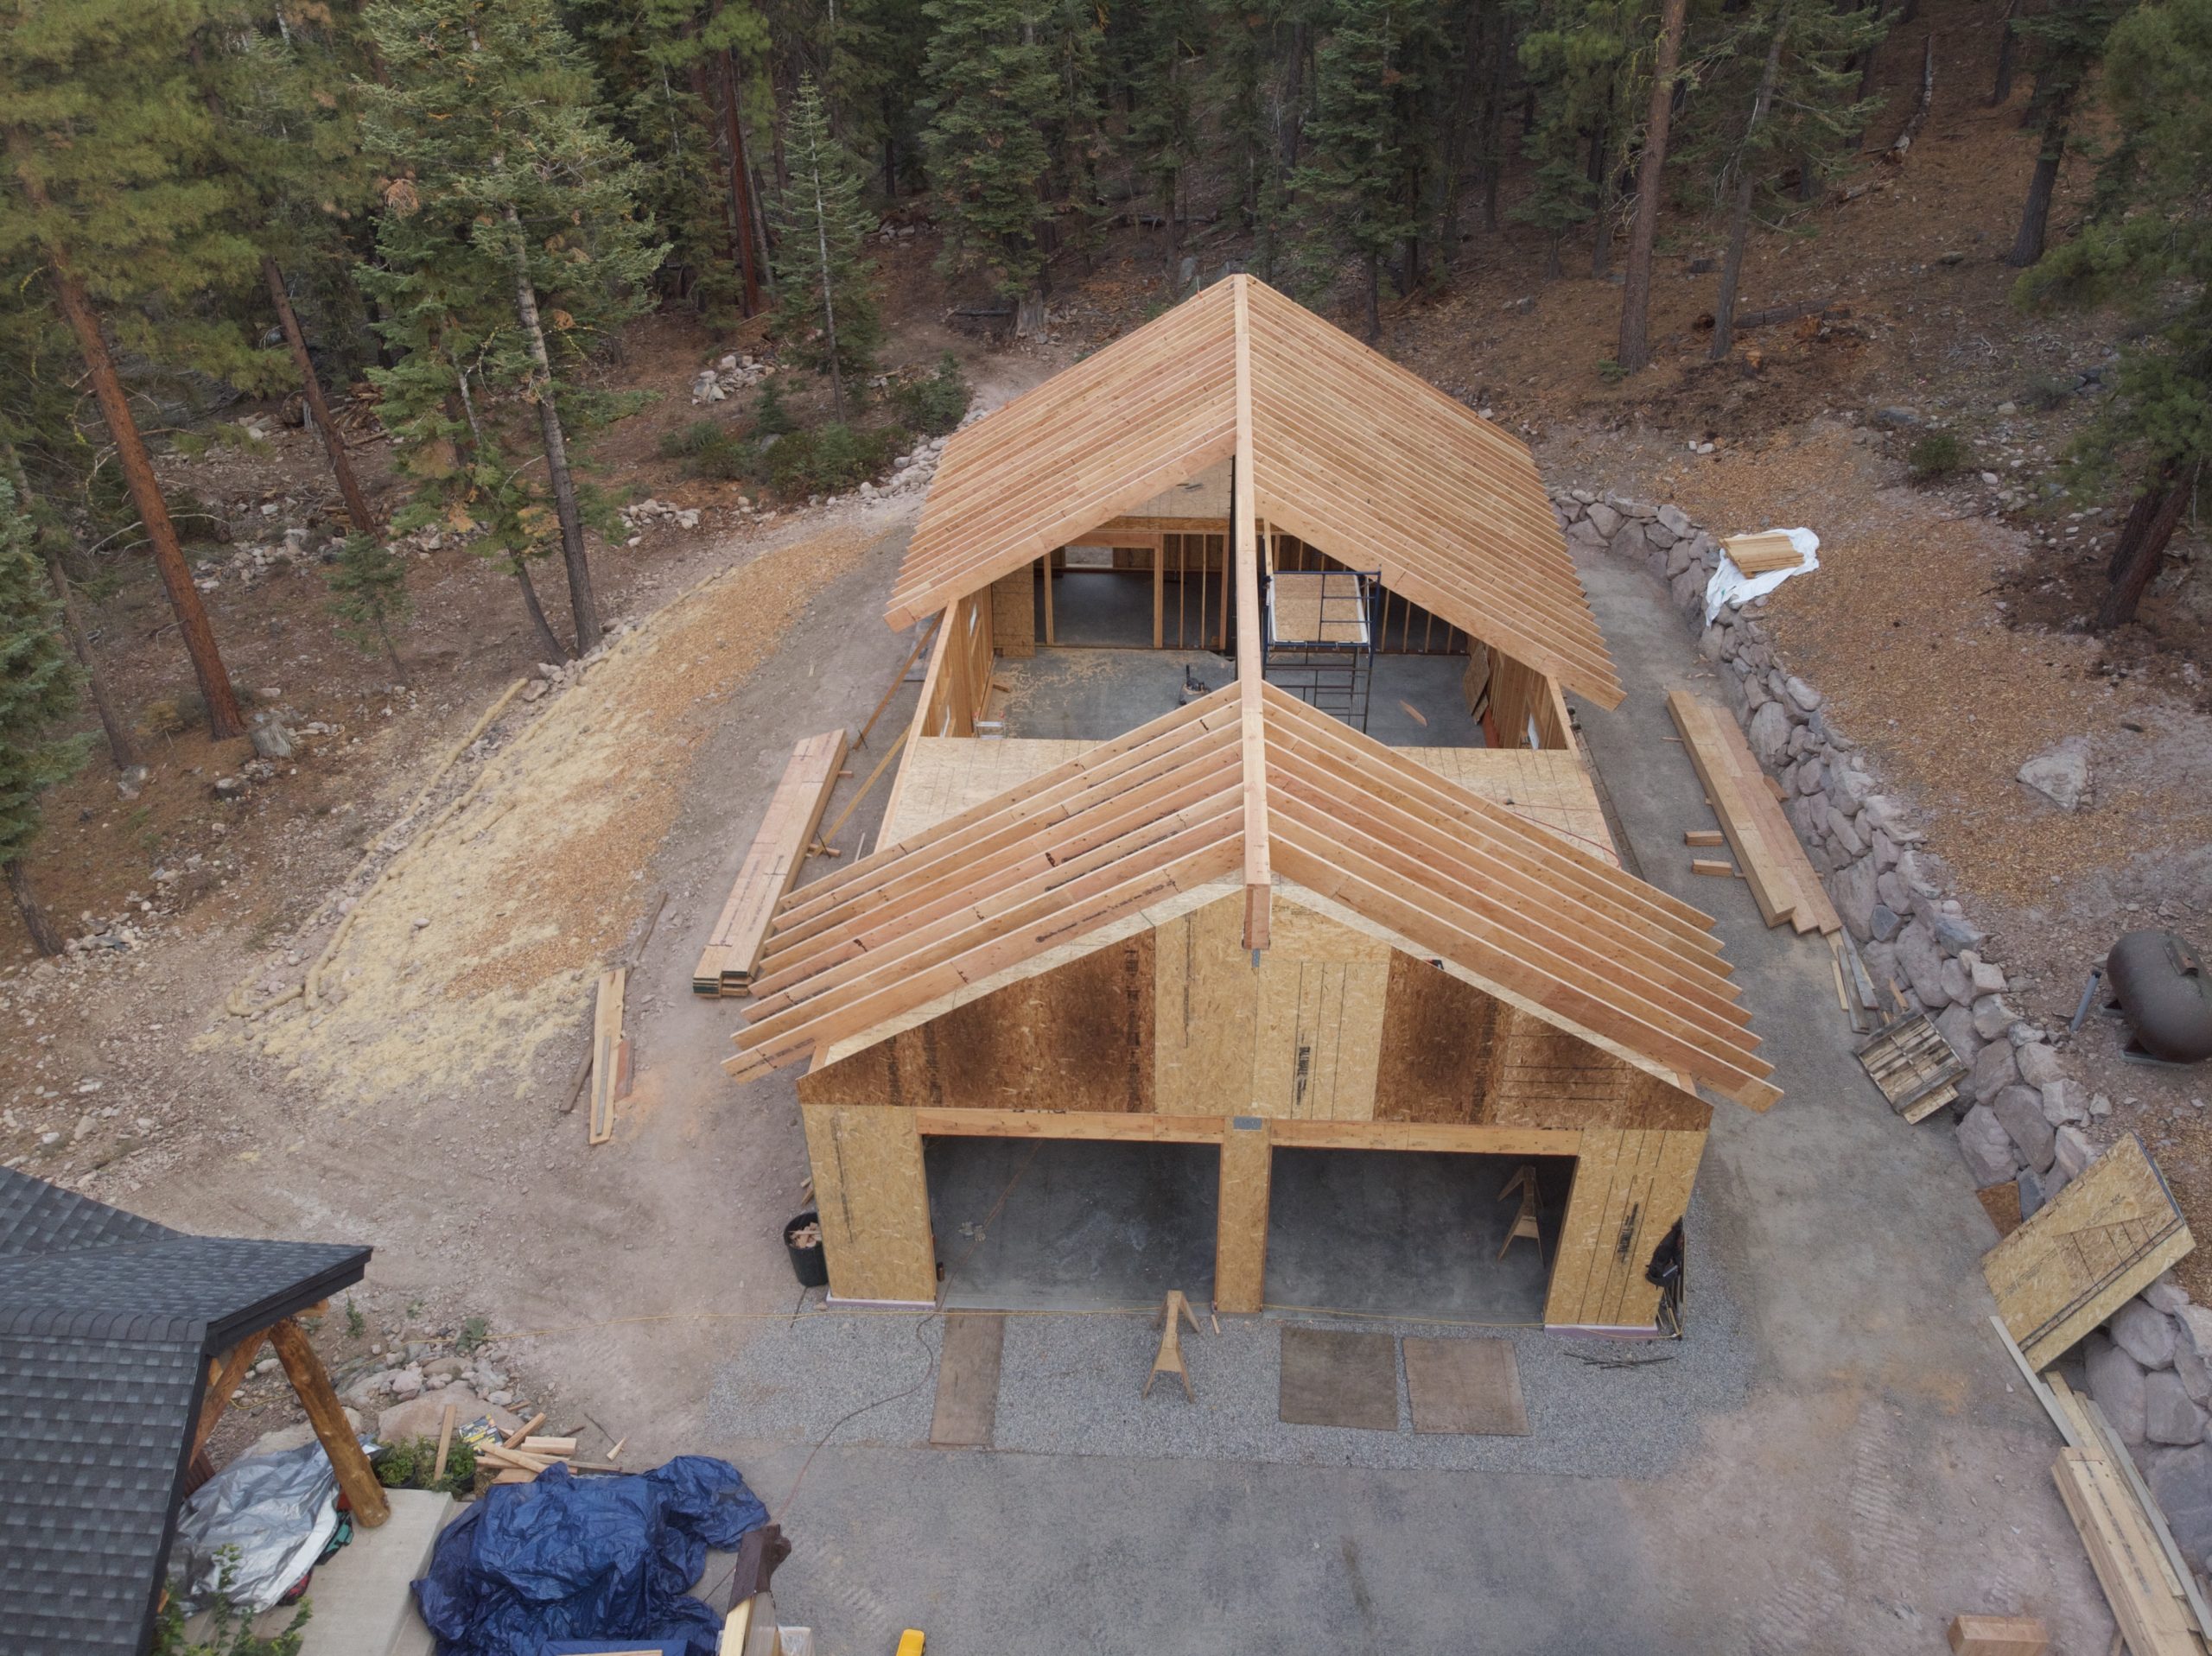
Neville and Chris figured out how the outside of the building would need to be assembled in order to get the desired overhang listed in the plans. The plans are a little vague in some spots, and I’m really glad I had some experienced carpenters to help figure out these things. We planned to use a 2×12 along the front of the building to match the house’s siding, but use the smaller facia that came with the wood package kit for the rest of the building. The outriggers were installed out front and back to accommodate this, and then the guys trimmed the rafter tails. We decided to not put no the under fascia at this time, and to get onto roofing.
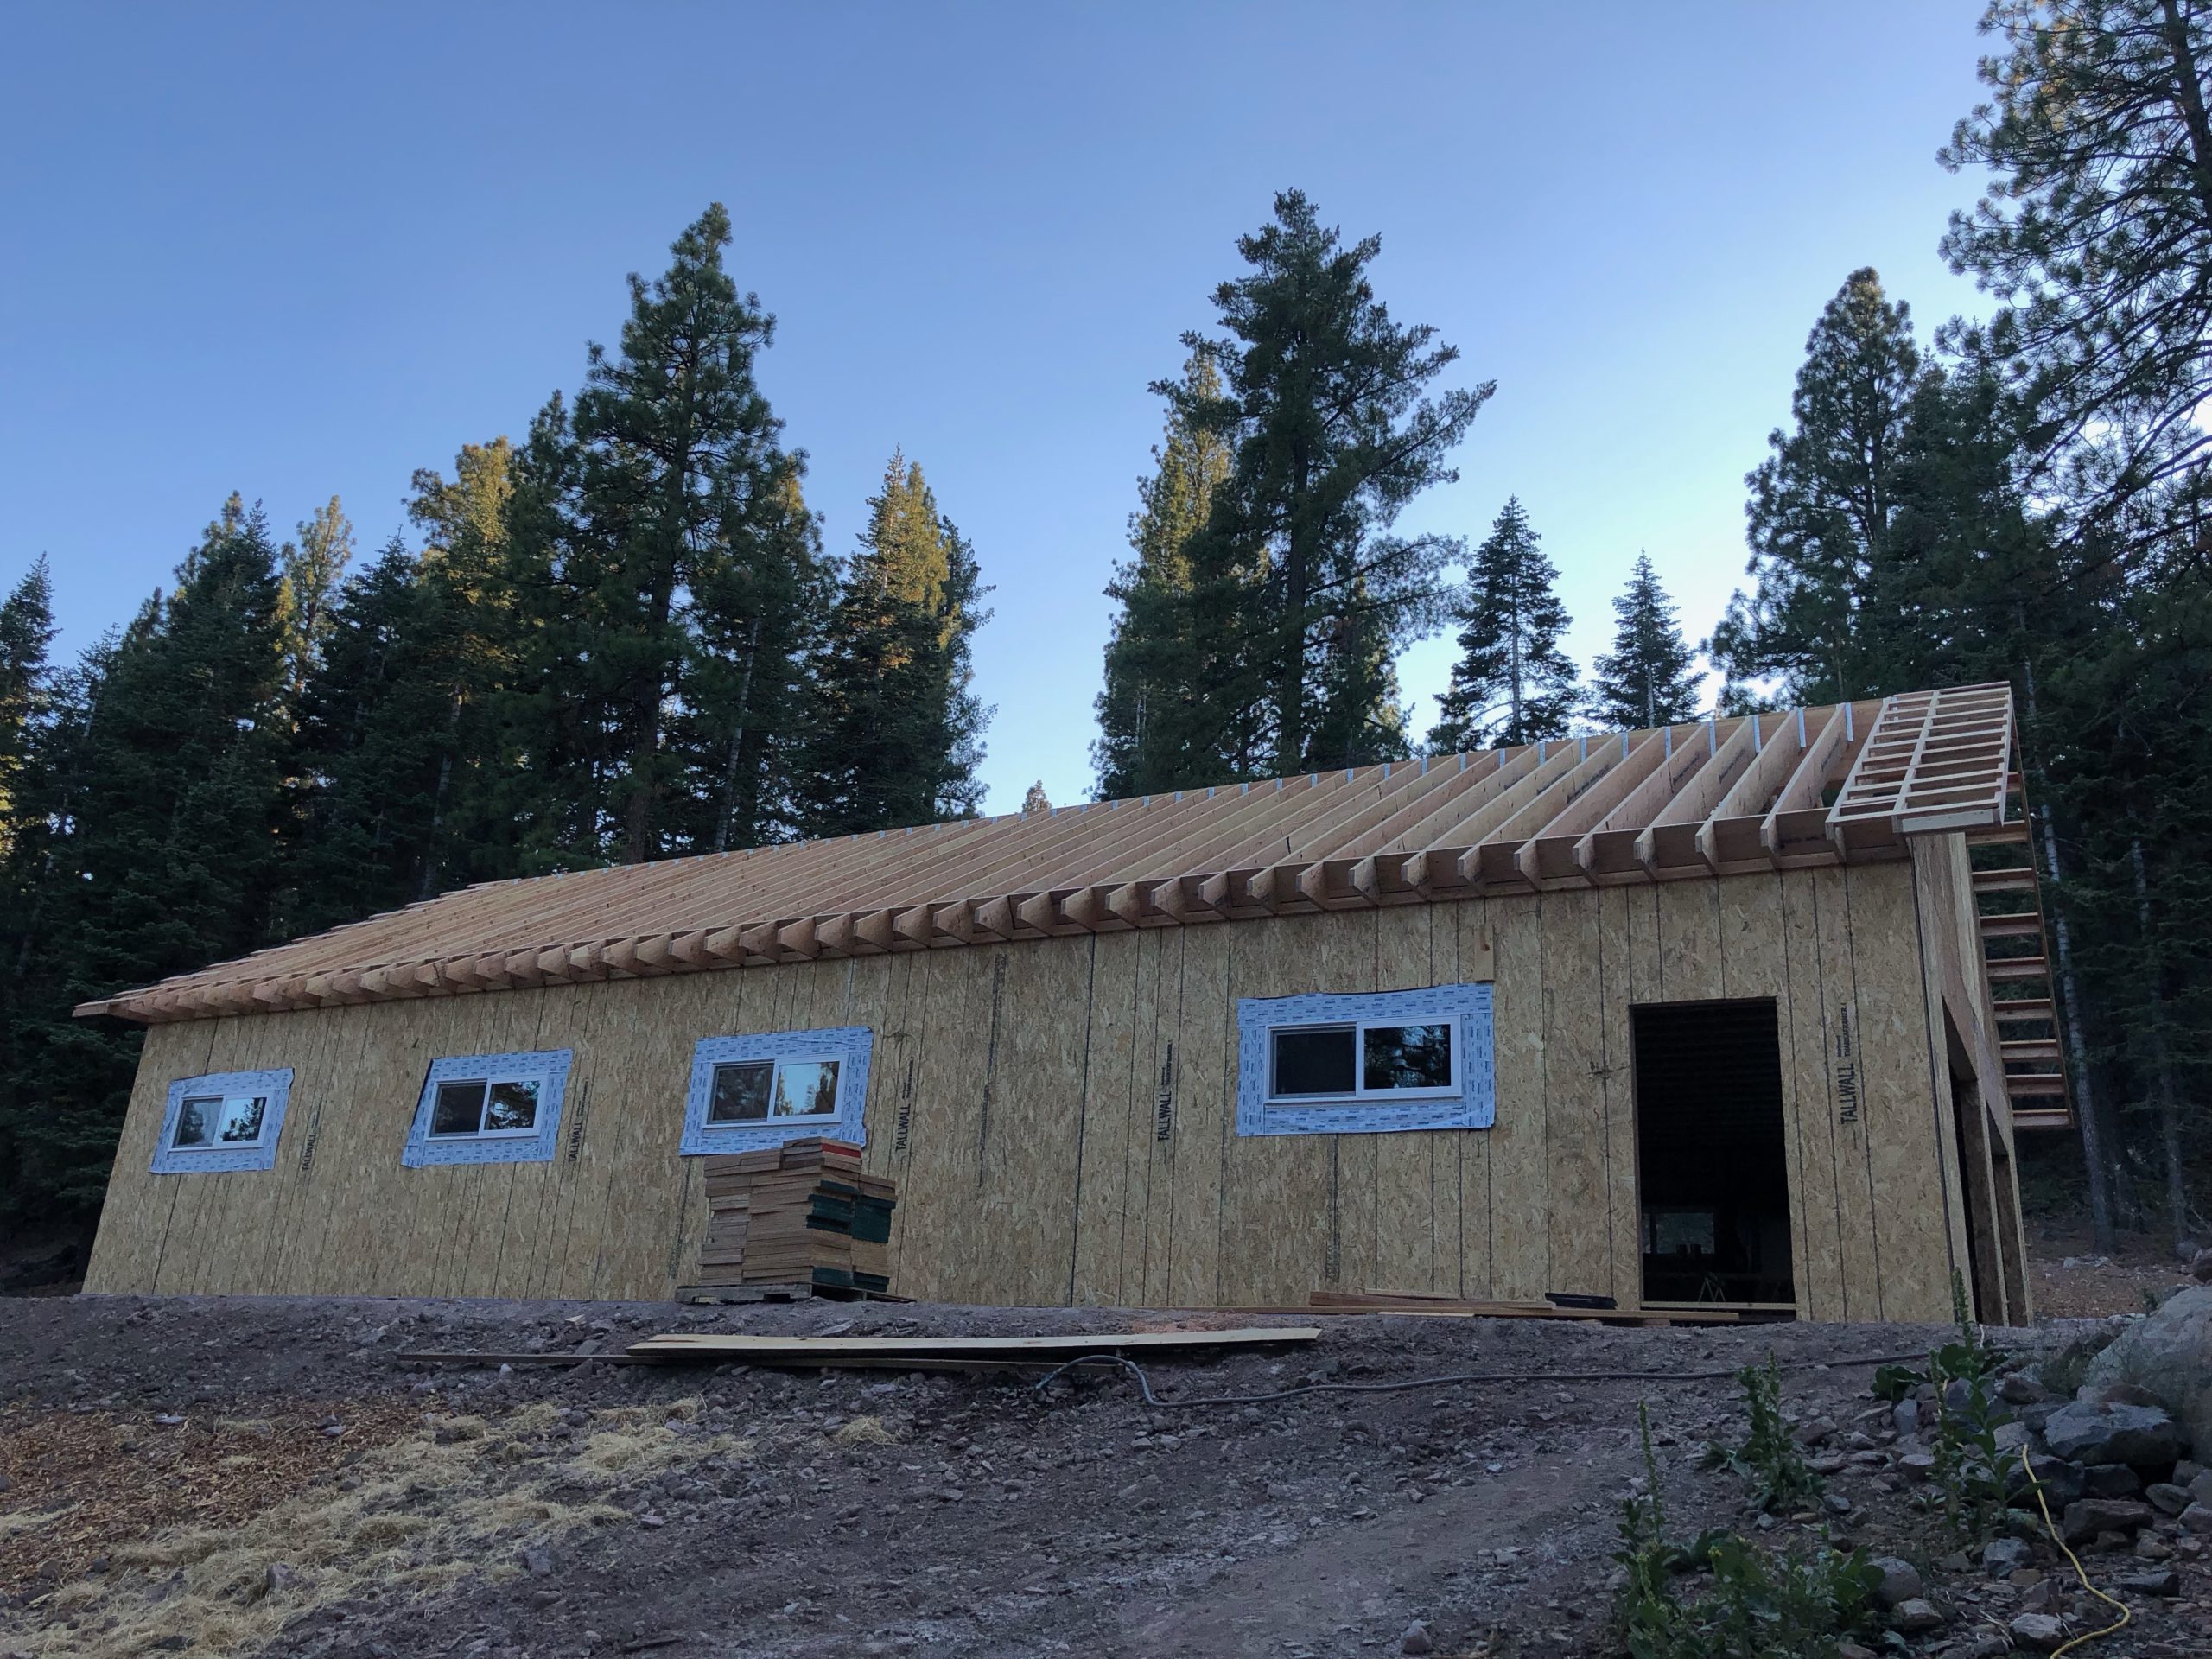
It took us a few days to get all the sheets of OSB (aka: cheap plywood) nailed on. And then we could finish off a few more of the details like the fascia.
At that point it was time for inspections; we had to have a “special inspection” done for the shear wall nailing. The welder recommended Nortech; we had to have the welds inspected for the posts, and they did the weld inspections, so I had them come over and also do the shear wall nailing. It was pretty easy; the guy looked over the pattern and noted a few spots where I was missing nails.
I then scheduled the county inspection for the roof sheathing. The inspector came over and I handed him the papers from the special inspections by Nortech. The first thing he said was that Nortech wasn’t on their approved list! I had found my compaction inspector (NV5) via their special list, but I forgot to verify that Nortech was on it. I had assumed they were, because they said they work in Truckee. Part of the problem with Truckee is that you could deal with one of three different building inspection agencies depending on the specific area you are located: Nevada County, Placer County or the Town of Truckee. I was dealing directly with Nevada County. Long story short: eventually Nortech got on their approved list and I was okay.


[…] the last post I wrote about how me and the crew got the building semi-roofed; the OSB sheathing covered most stuff and would keep out most rain. It did rain a bit and test the […]