The Duality Unicycle Handle – Part 1
Last year I ventured into the world of 3D printing when one of my friends gave me an old Airwolf 3D printer. It required a lot of tinkering to get good prints, and I learned a lot from it. I decided to upgrade to something more modern, and purchased an Original Prusa i3 MK3s+. 3D printers are handy for making simple functional objects and toys, but the real power is the rapid prototyping of custom designs.
This is a pretty standard unicycle handle that attaches to the front of the seat. It does double duty: it acts as a bumper for protecting the seat when the unicycle hits the ground, but more importantly it is a handle for holding on.
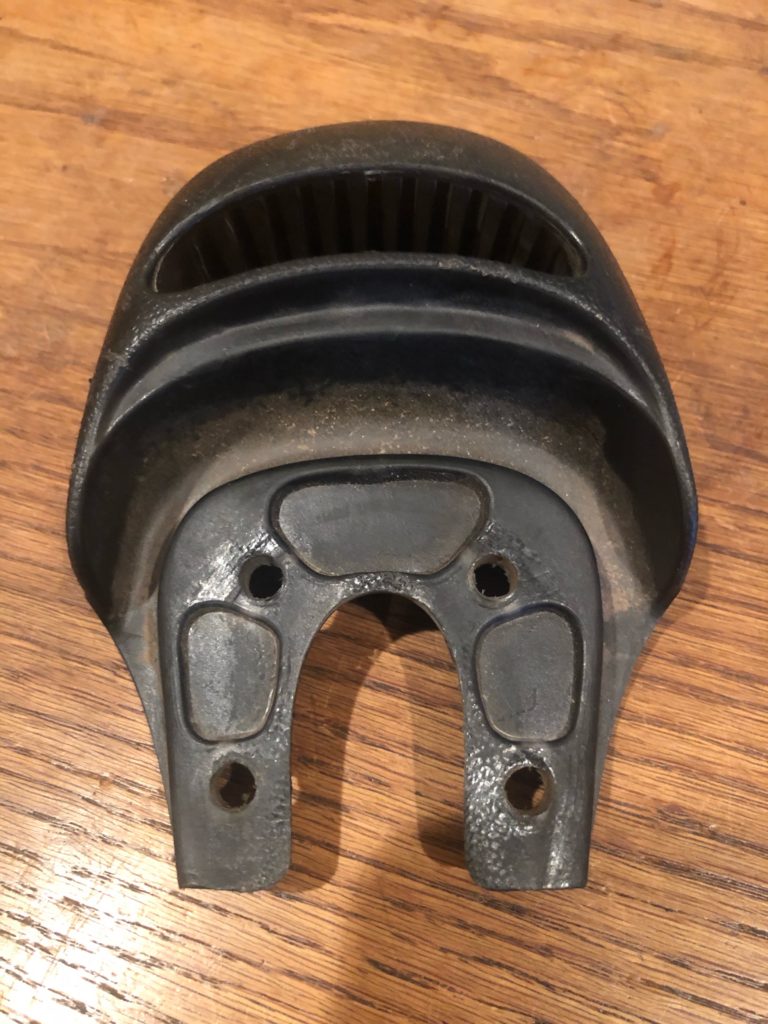
The design of the handle hasn’t changed much over the past 20+ years. Since then people have augmented the handle by adding a longer handlebar — I’ve experimented with this quite a bit over the years and my post on handlebars shows a few of the options I’ve done. I’ve replaced this plastic handle with some metal versions, but I have always migrated back to it, as it works well and is light weight.
One of the biggest problems I have with this handle is that it only has enough room to scoop it up with one hand at a time.
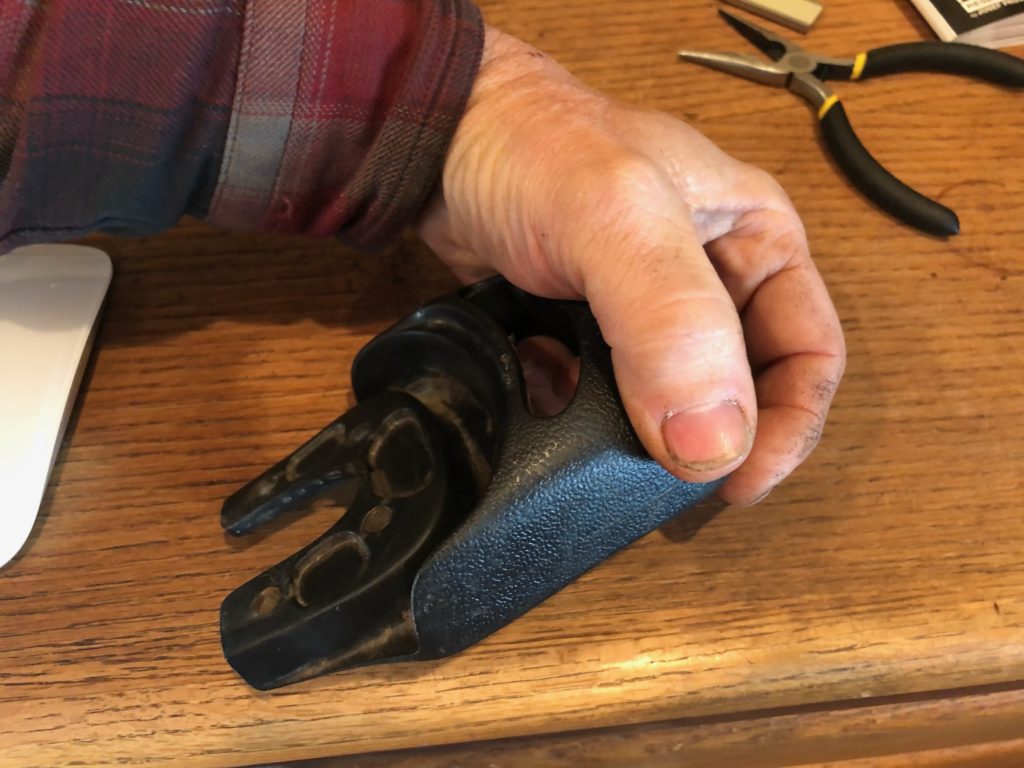
In general, one hand is fine because most unicyclists fling one arm out in the air for balance and hold onto the unicycle with the other arm’s hand. Once you get a bit more skilled the flailing starts to reduce to a minimum, and it is really nice to grab the handle with both hands for steep uphill climbs. And sometimes it is nice to put the palm of one’s hands on the handlebar and push down to lift your butt off the seat a bit and give some comfort on longer rides. One can fit both hands on the handle, but it isn’t all that comfortable because your fingers are a bit squished.
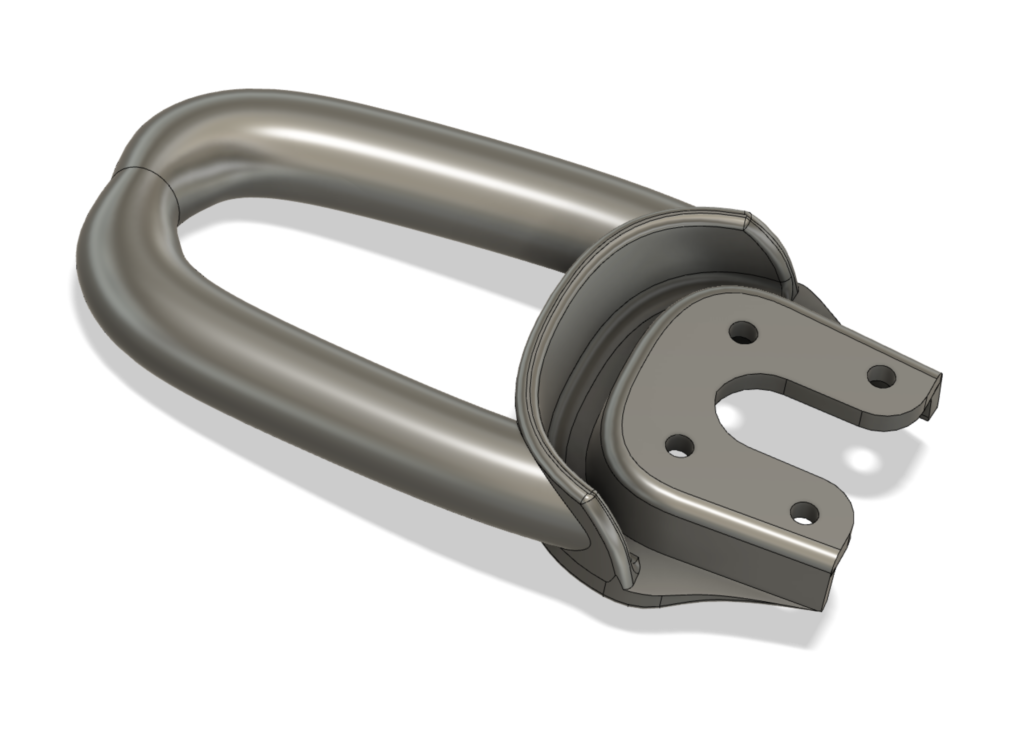
I jumped into Fusion 360 and designed this custom handle to address the issues I have. The design also will allow direct mounting of a brake to the tubing; this isn’t something I need, as I attach my brake to my extended handlebar in front of this piece.
Well, before I got to this stage I did some test prints in PLA to ensure proper fit. In the photo below you can see my process, doing slight tweaks to the design as necessary. I based the primary bumper shape on the original handle, shown in black in the lower right.
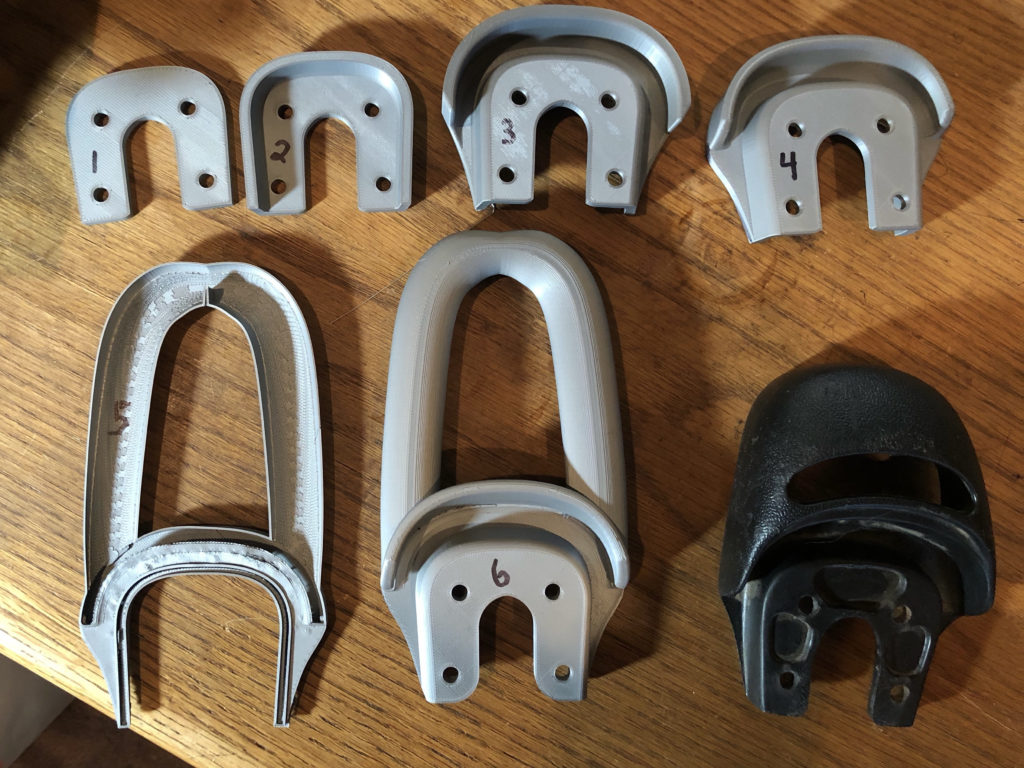
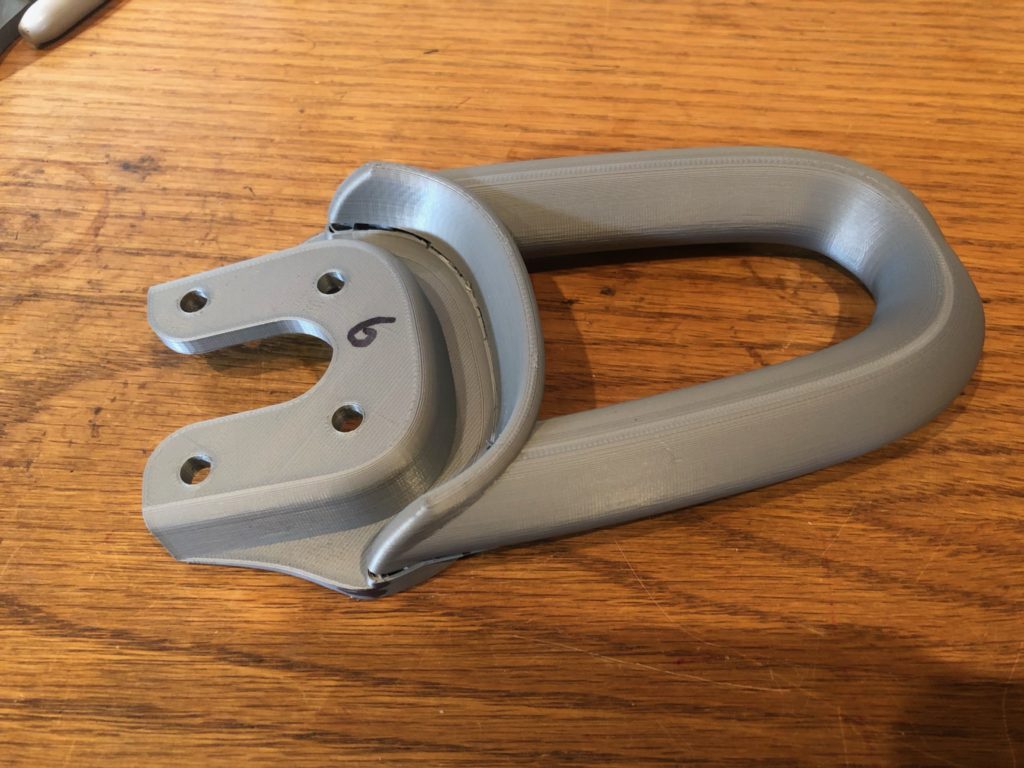
Test #5 was a failure; I was printing at 15% infill and switched to 0% just to save some plastic when doing my fitting tests; it didn’t work due to too large of an overhang on the top portion.
Test #6 was close – it fit and felt good, but the angle was not right and it needed a few small mods. I also pushed it forward lightly and snapped it! This print was at 10% infill, which is very weak. It did allow me to see where the handle will want to brake at. Test #6 took about 8 hours to print at 0.15mm layer heights and slow speeds for good quality.
PLA isn’t strong and is rather brittle. I’m planning on printing it in ABS (or Prusa’s ASA), but at first I’m doing another test in PETG which is still easy to print but has better strength qualities than PLA. The PETG might be strong enough, but I doubt it. The ABS should be strong enough, but if it tends to snap I’ll have to go to a PC (polycarbonate) filament, or something more exotic like carbon fiber infused filament.
Currently I’m doing test print #7. 0.2mm layer heights with PETG. 16 hours estimated time.
Continue on to part #2 where I discuss strength.


