Elithion BMS Display – part 1
I want a better BMS display for my car. I have the Elithion BMS “Pro“, which has worked pretty well in my conversion. Sometimes it gives faults earlier than I would want, and sometimes I’ve had bank communication errors that really shouldn’t happen (all connections are tight, and I don’t have excessive noise in my environment). There are a few displays out there listed on the Elithion website. I have the round small one made by elithion; it is lacking in features and doesn’t have the ability to show fine grained state of charge. There are simply 10 bars, and that means at any given time the car could be within a 10% range of state of charge. I want a specific number showing me the SOC. The fault indication is also not very good; the blinking light isn’t very useful other than to give you a warning something is wrong; sure, it warns, but why? you have to hook up another display (like an iPhone) or a computer to see what is up. The “third party” K & K Multifunction display is large and ugly…and I want something I can control.
So, I’m going to write my own hardware/software combo. I bought:
1. Arduino Leonardo (I have an UNO in my car already)
2. Adafruit 2.2 TFT display— Now I realize you can get much cheaper ones at other locations (oh well)
3. Canbus shield from spark fun
I quickly ran into problems with this basic hardware. The display doesn’t work with a Leonardo unless you wire directly to the ICSP pins on the board (well, it will work in software mode, which is slow). I initially did wire it up, but then realized another problem. The Canbus shield won’t at all work with the Leonardo. It really assumes the ICSP pins are wired based on the UNO spec. So, I went out and bought an UNO from radioshack (expensive! but I wanted one that day).
The next problem was that the demo code for the Adafruit display really sucks. The fonts are horrible, and the graphics are terrible. Luckily, I found a great library called UTFT by Henning Karlsen. It worked with the display I had..but only ran in serial mode. That was going to be a problem, as it was horribly slow, and worse, conflicted with the Canbus shield. As soon as the Canbus shield was initialized the UTFT library stopped working. I realized it was because the UTFT library assumes 100% control of all the pins, whereas I wanted it to share all the pins and use the SPI method of talking (which only requires one dedicated pin to talk to a particular device — this works by having a “Chip select” (CS) pin that identifies when that device is being talked to).
So, I took the time to port the UTFT library to the Adafruit 2.2 shield, by using the (ugly) code from adafruit as a drop in hack to get it working. It took a while, but I figured it all out, and now understand a lot more about the Arduino hardware and how things work with it. (Code available soon)
So now, it is time to read the Canbus spec and get rolling. http://lithiumate.elithion.com/php/controller_can_specs.php
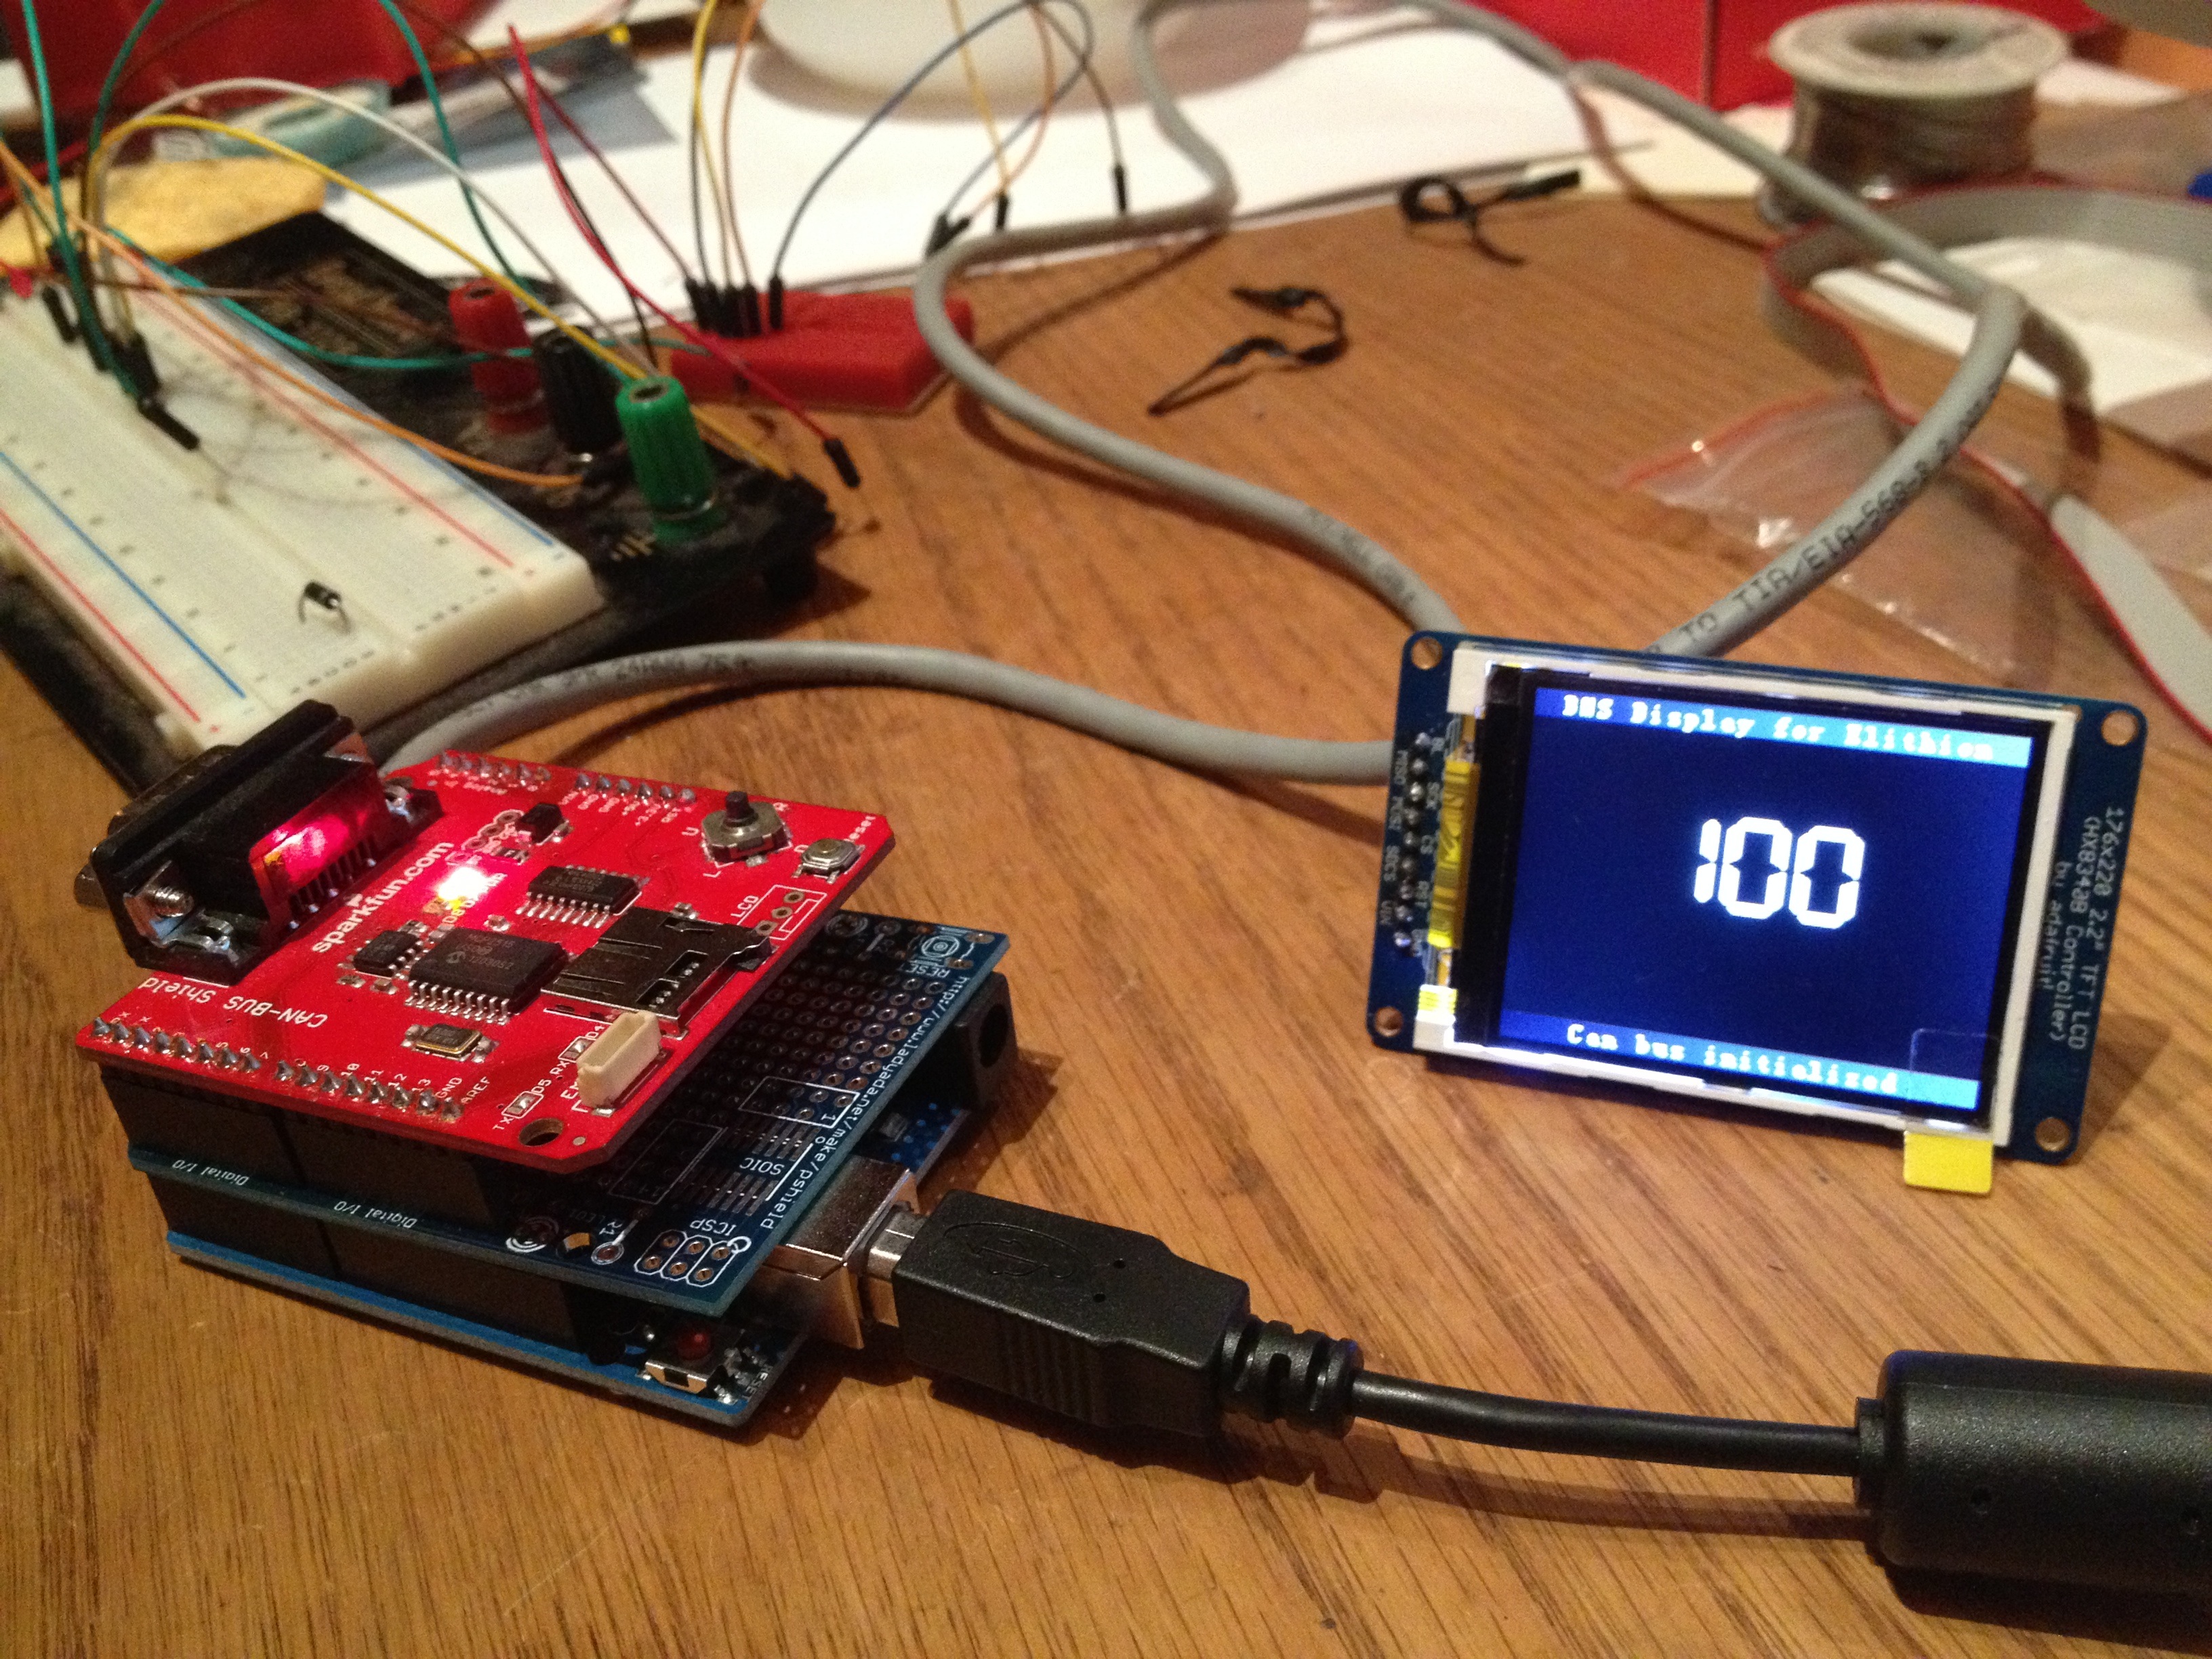
In the picture above: Arduino on bottom, Adafruit prototype shield in the middle (hooking pins up to the display), and the Canbus shield on top. I also plan to add some other neat things, like temperature reading and GPS information. That way I can calculate how many miles are left based on the state of charge and what watt/hours per mile the car has actually been getting.


[…] Elithion BMS Display – part 1 […]