All posts in April, 2009
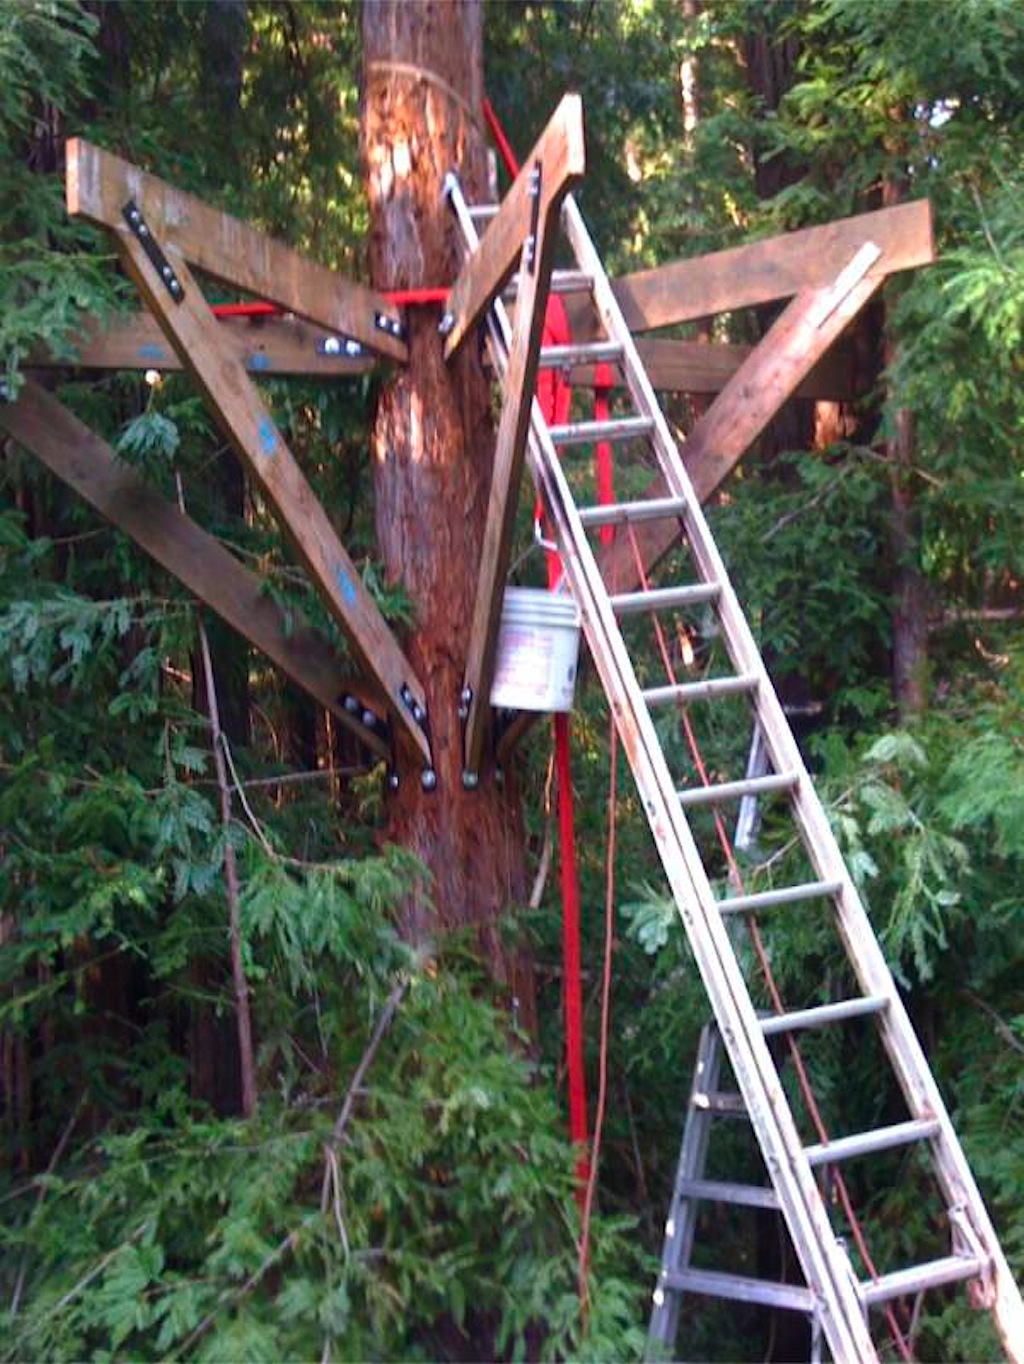
The Circular Treehouse – Beam Install
The first step was to install the top brackets. Well, first had to get the proper bolts. I wanted to use 3/4″ thick (radius) by 8″ long lag bolts — galvanized to support the weather.... [read more]
Apr
30
2009
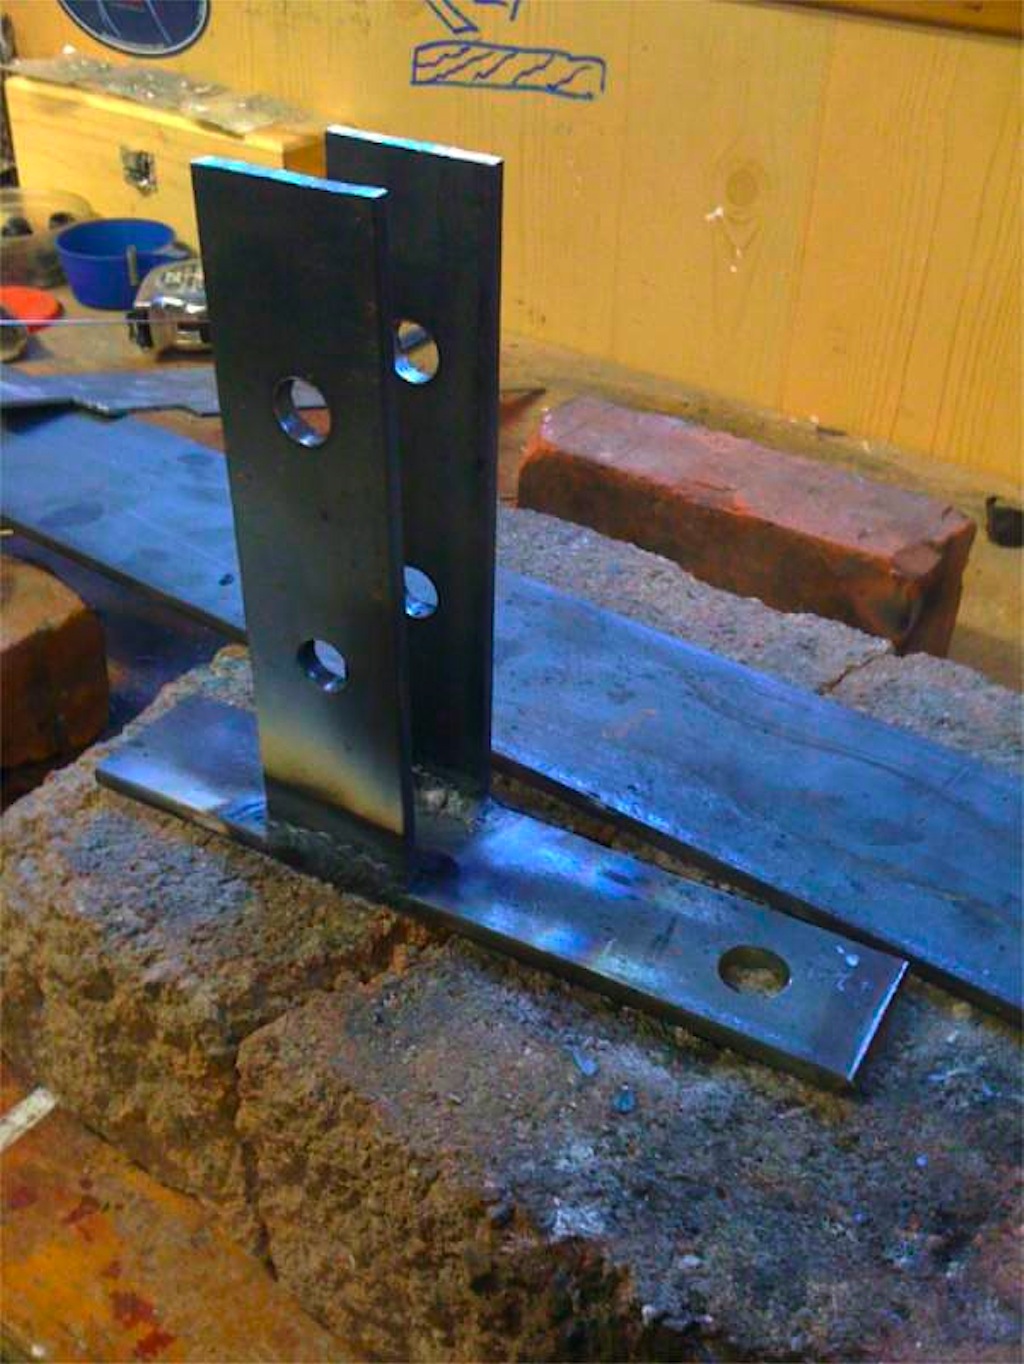
The Circular Treehouse – Bracket Fabrication
I bought some 4” wide by 1/4” thick steel from SIMS metal in San Jose with the intent on using it to make brackets. Now, 4” would be perfect if I used 4x4s for the... [read more]
Apr
29
2009
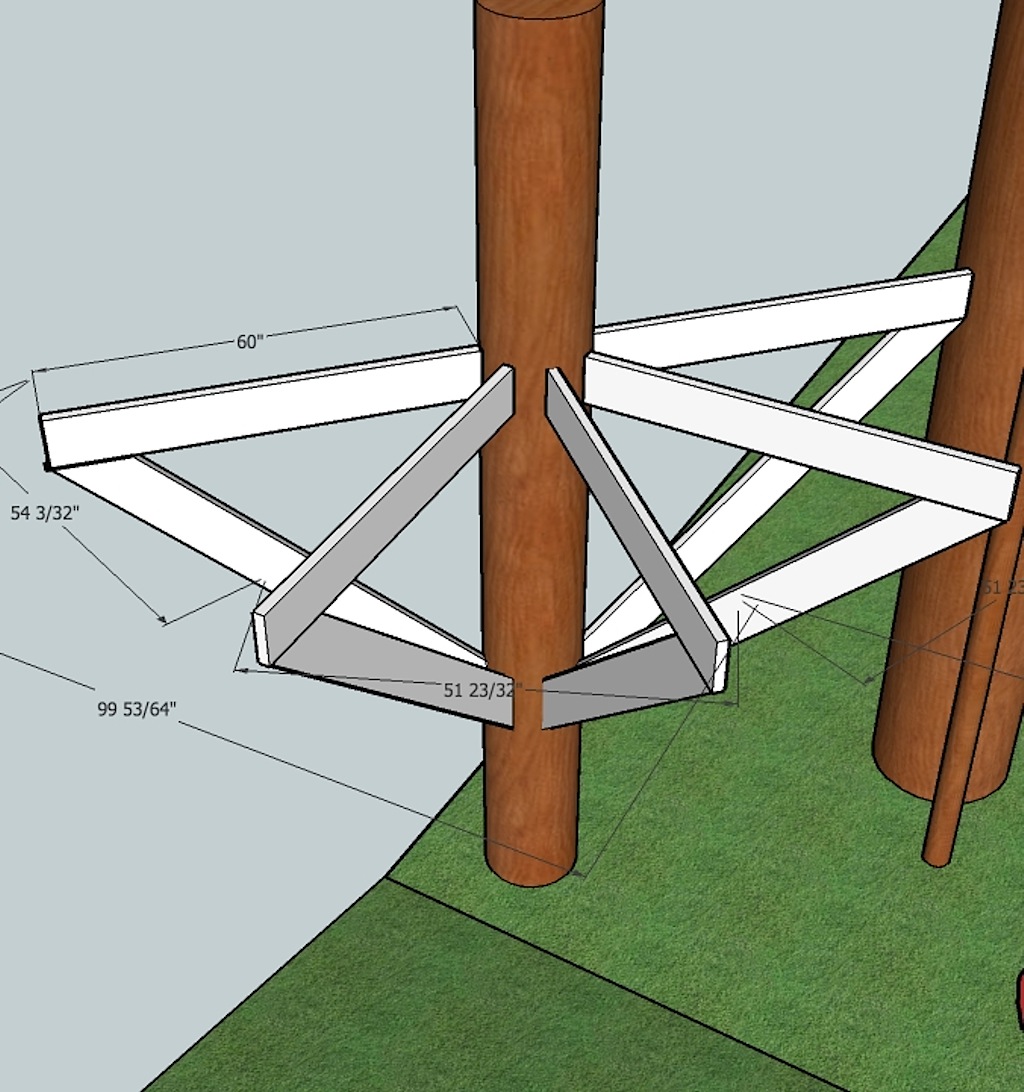
The Circular Treehouse – Updated Plans
I decided to redo my “special event” treehouse concept. I wanted something far enough out in front of the trees to suffice as a proper area to stand for the ceremony, and the typical umbrella... [read more]
Apr
28
2009
Tree Top Builders
I would like to give a big thanks to Dan Wright, from Tree Top Builders out in PA. Dan has been building some amazing treehouses for quite some time and is well experienced in the... [read more]
Apr
28
2009
As an Amazon Associate I earn from qualifying purchases.
(c) 2008-2026 Corbin Dunn
Subscribe to RSS feeds for entries.
53 queries. 0.293 seconds.